Difference between revisions of "Assembling SimuCUBE 480W/720W kit"
| [checked revision] | [checked revision] |
(Created page with "1) Cut off the round parts from the acrylic back plate and save these for later. These will be used as spacers for the SimuCUBE motherboard. File:big_case_spacers.png 2)...") |
|||
| Line 1: | Line 1: | ||
1) Cut off the round parts from the acrylic back plate and save these for later. These will be used as spacers for the SimuCUBE motherboard. | 1) Cut off the round parts from the acrylic back plate and save these for later. These will be used as spacers for the SimuCUBE motherboard. | ||
| − | [[File:big_case_spacers.png]] | + | [[File:big_case_spacers.png|thumbnail|Test text|480px|none]] |
2) Attach grounding and mains wires to the power connector | 2) Attach grounding and mains wires to the power connector | ||
| Line 7: | Line 7: | ||
3) Fix the power plug to the acrylic back plate with M3x10 countersunk screws and M3 locking nuts. | 3) Fix the power plug to the acrylic back plate with M3x10 countersunk screws and M3 locking nuts. | ||
| − | [[File:big_case_powerplug1.png]] [[File:big_case_powerplug2.png]] | + | [[File:big_case_powerplug1.png|thumbnail|Test text|480px|none]][[File:big_case_powerplug2.png|thumbnail|Test text|480px|none]] |
4) Put the two pieces of thin tape to the power supply as in the image (helps with assembly). Unscrew the marked screws to detach the DIN rail connector and the other marked screws. Follow the instructions with the type of power supply you have (SDR-480 or NDR-480). | 4) Put the two pieces of thin tape to the power supply as in the image (helps with assembly). Unscrew the marked screws to detach the DIN rail connector and the other marked screws. Follow the instructions with the type of power supply you have (SDR-480 or NDR-480). | ||
| Line 46: | Line 46: | ||
TODO: photo of assembled system | TODO: photo of assembled system | ||
| − | |||
| − | |||
| − | |||
| − | |||
[[Category:Work_in_progress_pages]] | [[Category:Work_in_progress_pages]] | ||
Revision as of 08:41, 12 June 2016
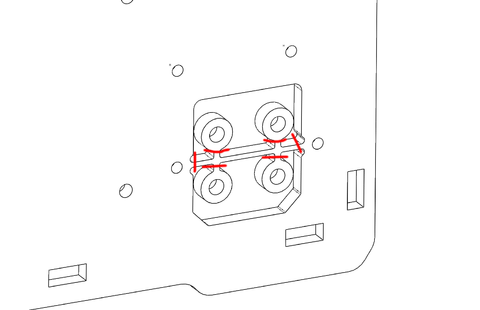
1) Cut off the round parts from the acrylic back plate and save these for later. These will be used as spacers for the SimuCUBE motherboard.
2) Attach grounding and mains wires to the power connector
TODO: photo of connector
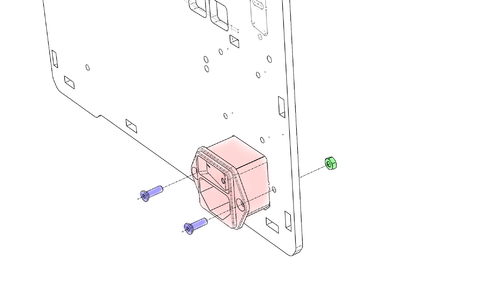
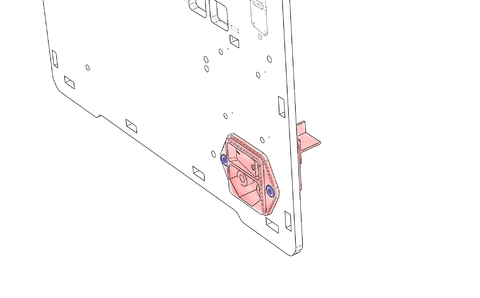
3) Fix the power plug to the acrylic back plate with M3x10 countersunk screws and M3 locking nuts.
4) Put the two pieces of thin tape to the power supply as in the image (helps with assembly). Unscrew the marked screws to detach the DIN rail connector and the other marked screws. Follow the instructions with the type of power supply you have (SDR-480 or NDR-480).
TODO: photo of DIN rail connector removal TODO: photo of SDR-480 screws TODO: photo of NDR-480 screws
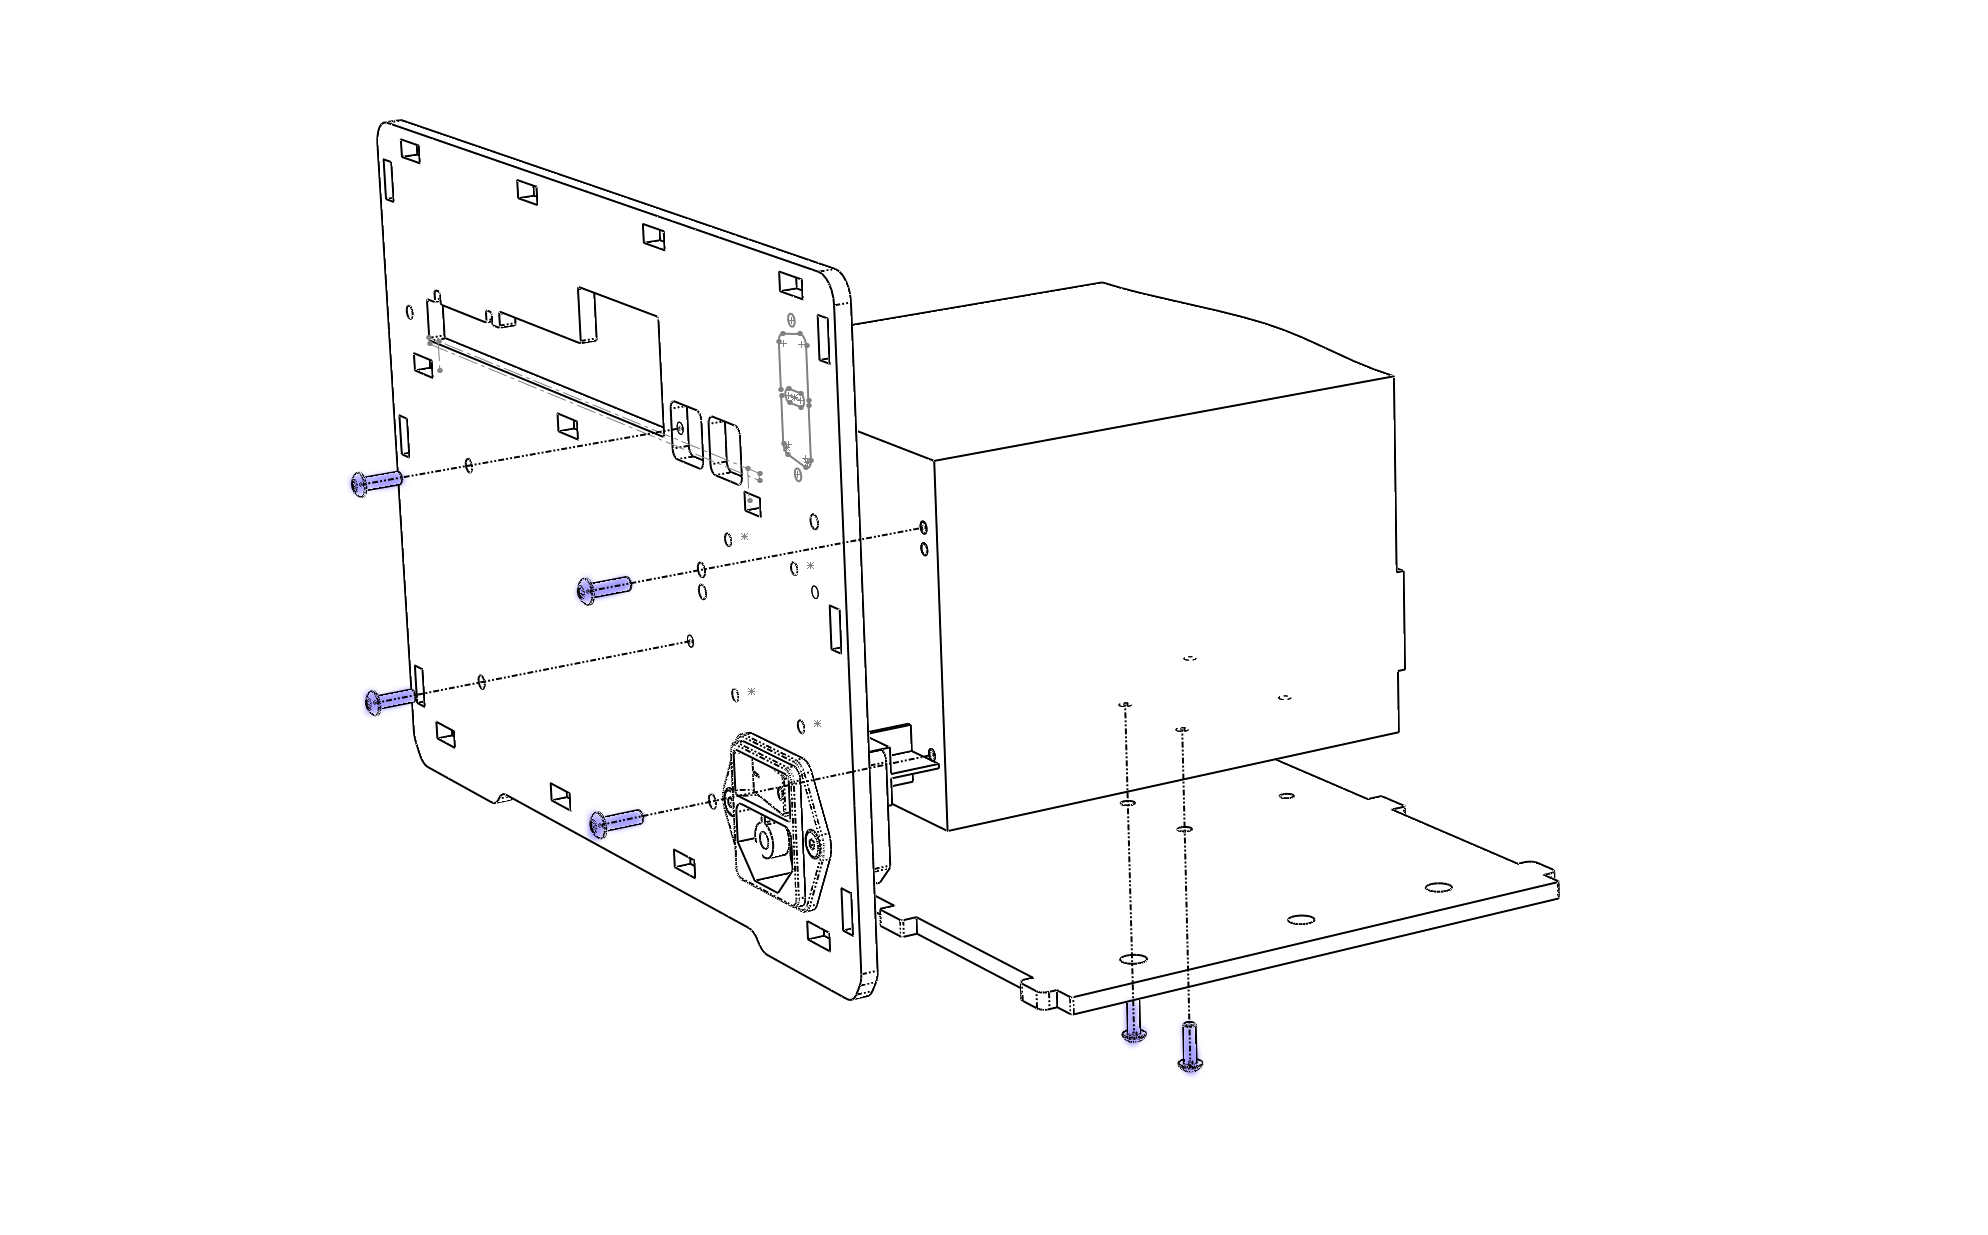
5) Attach the power supply to the back plate with four M3x10 button head screws (be careful, do not tighten too much!). Slide the bottom plate below the power supply (use the two screwless holes on the bottom of the PSU as a reference to align the bottom) and to the slots on the back plate and screw two M3x10 button head screws from the bottom.
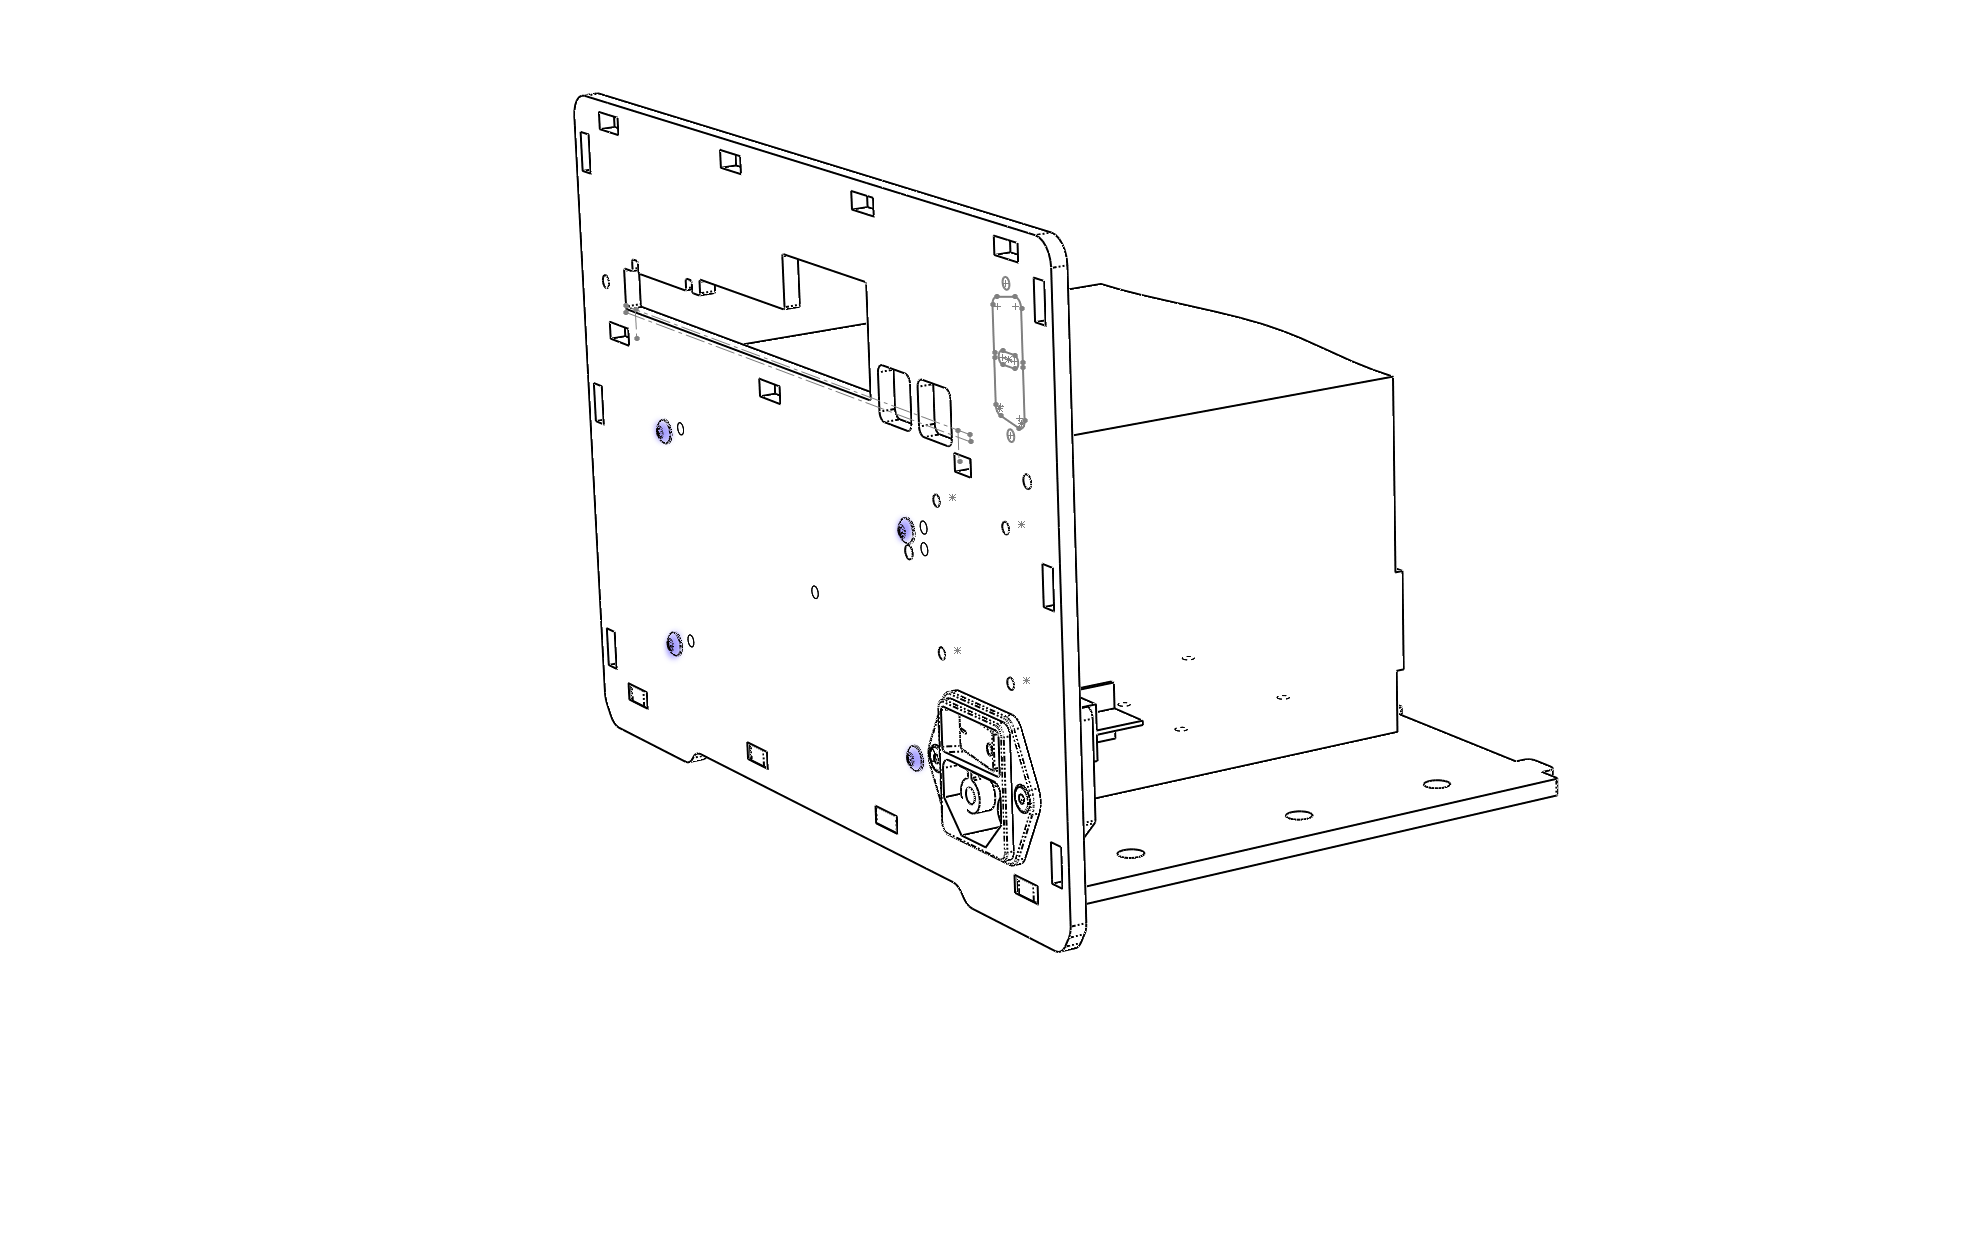
6) Connect grounding and mains wires to the power supply's screw terminal.
TODO: photo of grounding and mains wires connection to the PSU
7) Attach IONI to the SimuCUBE motherboard by pressing it to the PCI-E-type connector. Align the motherboard onto the acrylic middle piece so that the edge of the connector edge of the circuit board is flush with the main edge of the acrylic (not the three protruding parts) and the holes line up. Use the four spacers cut from the acrylic back plate, four M4x16 screws and four locking nuts.
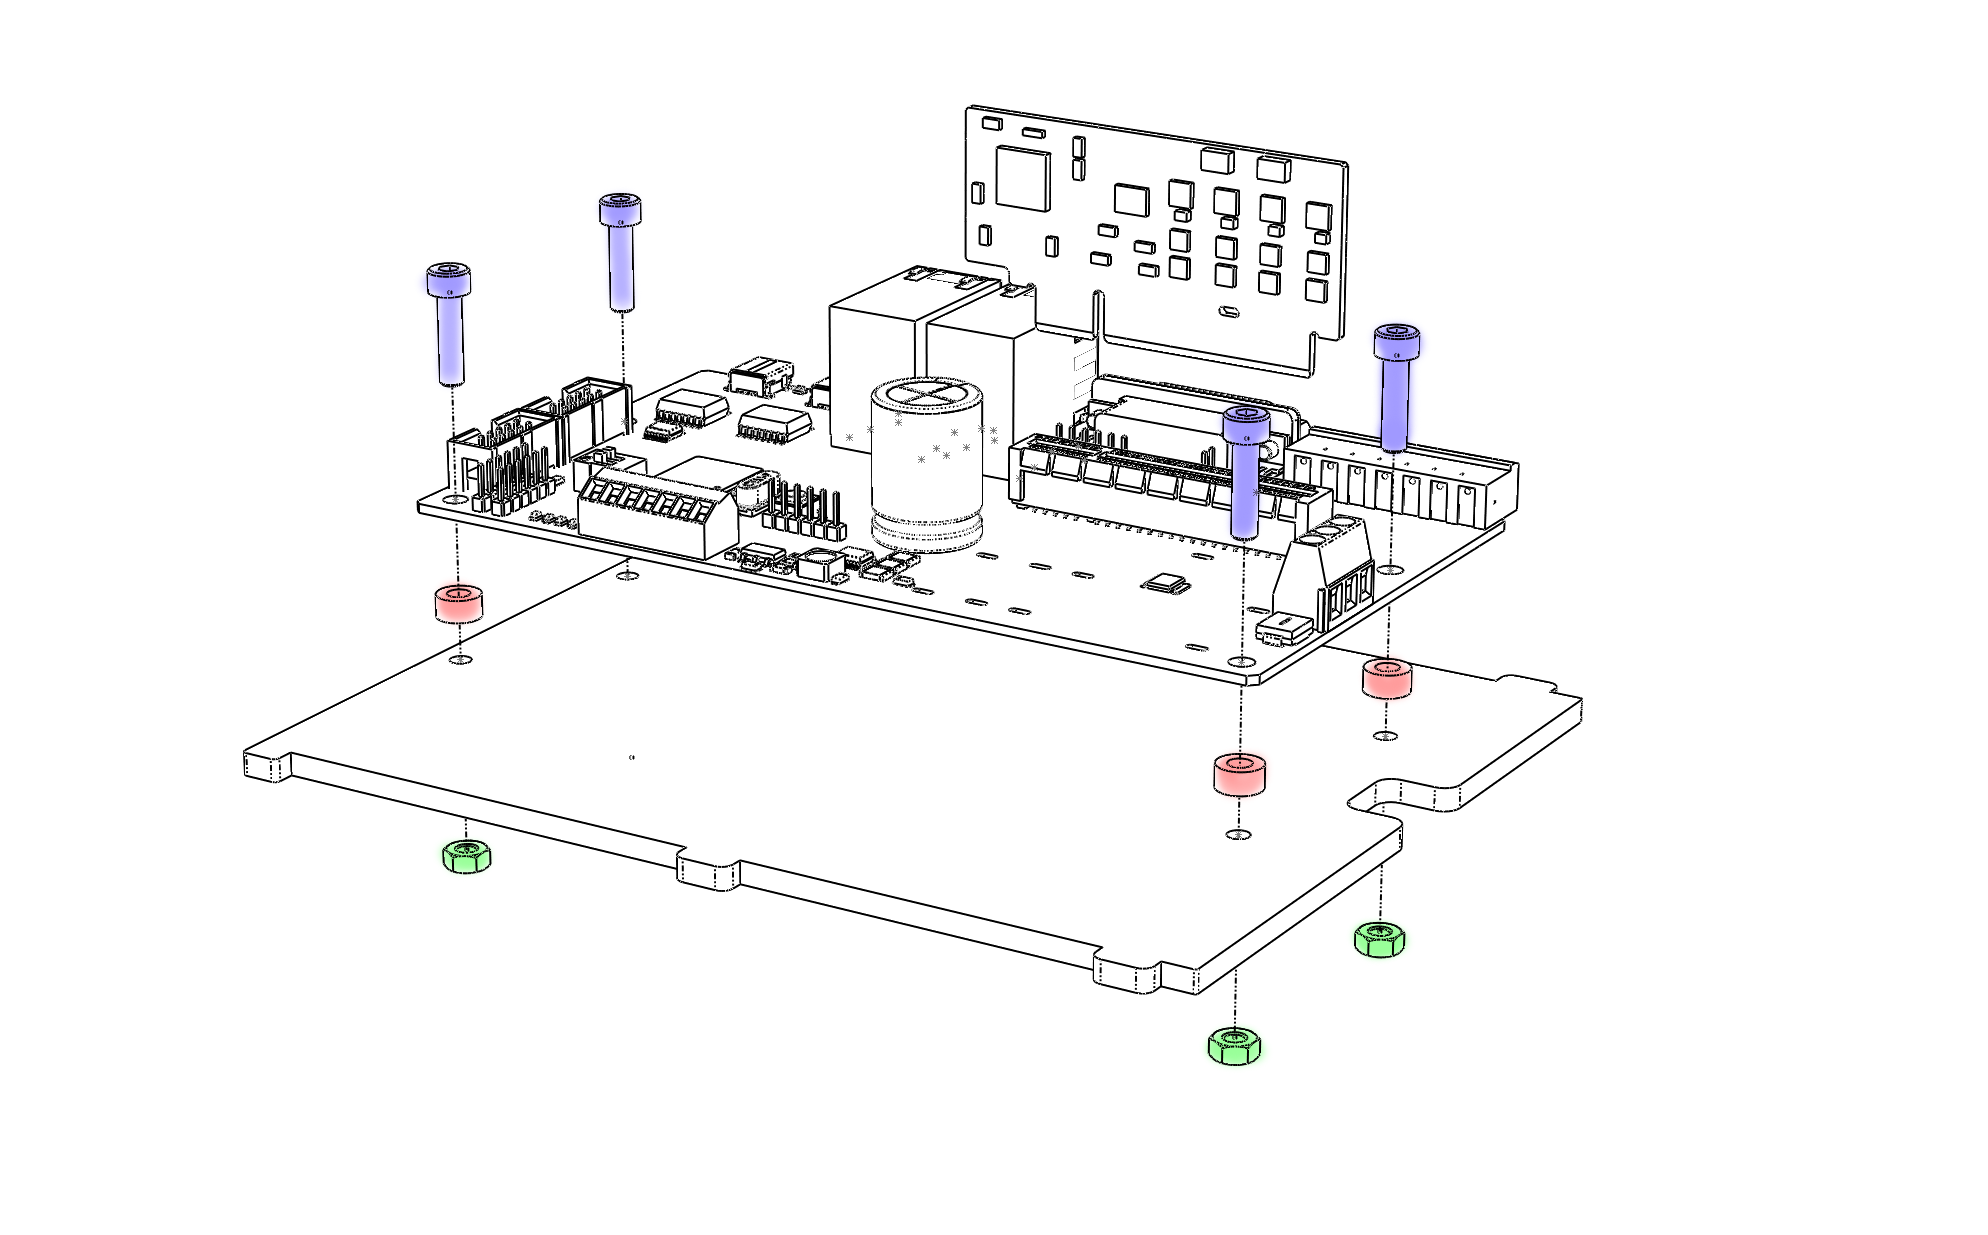
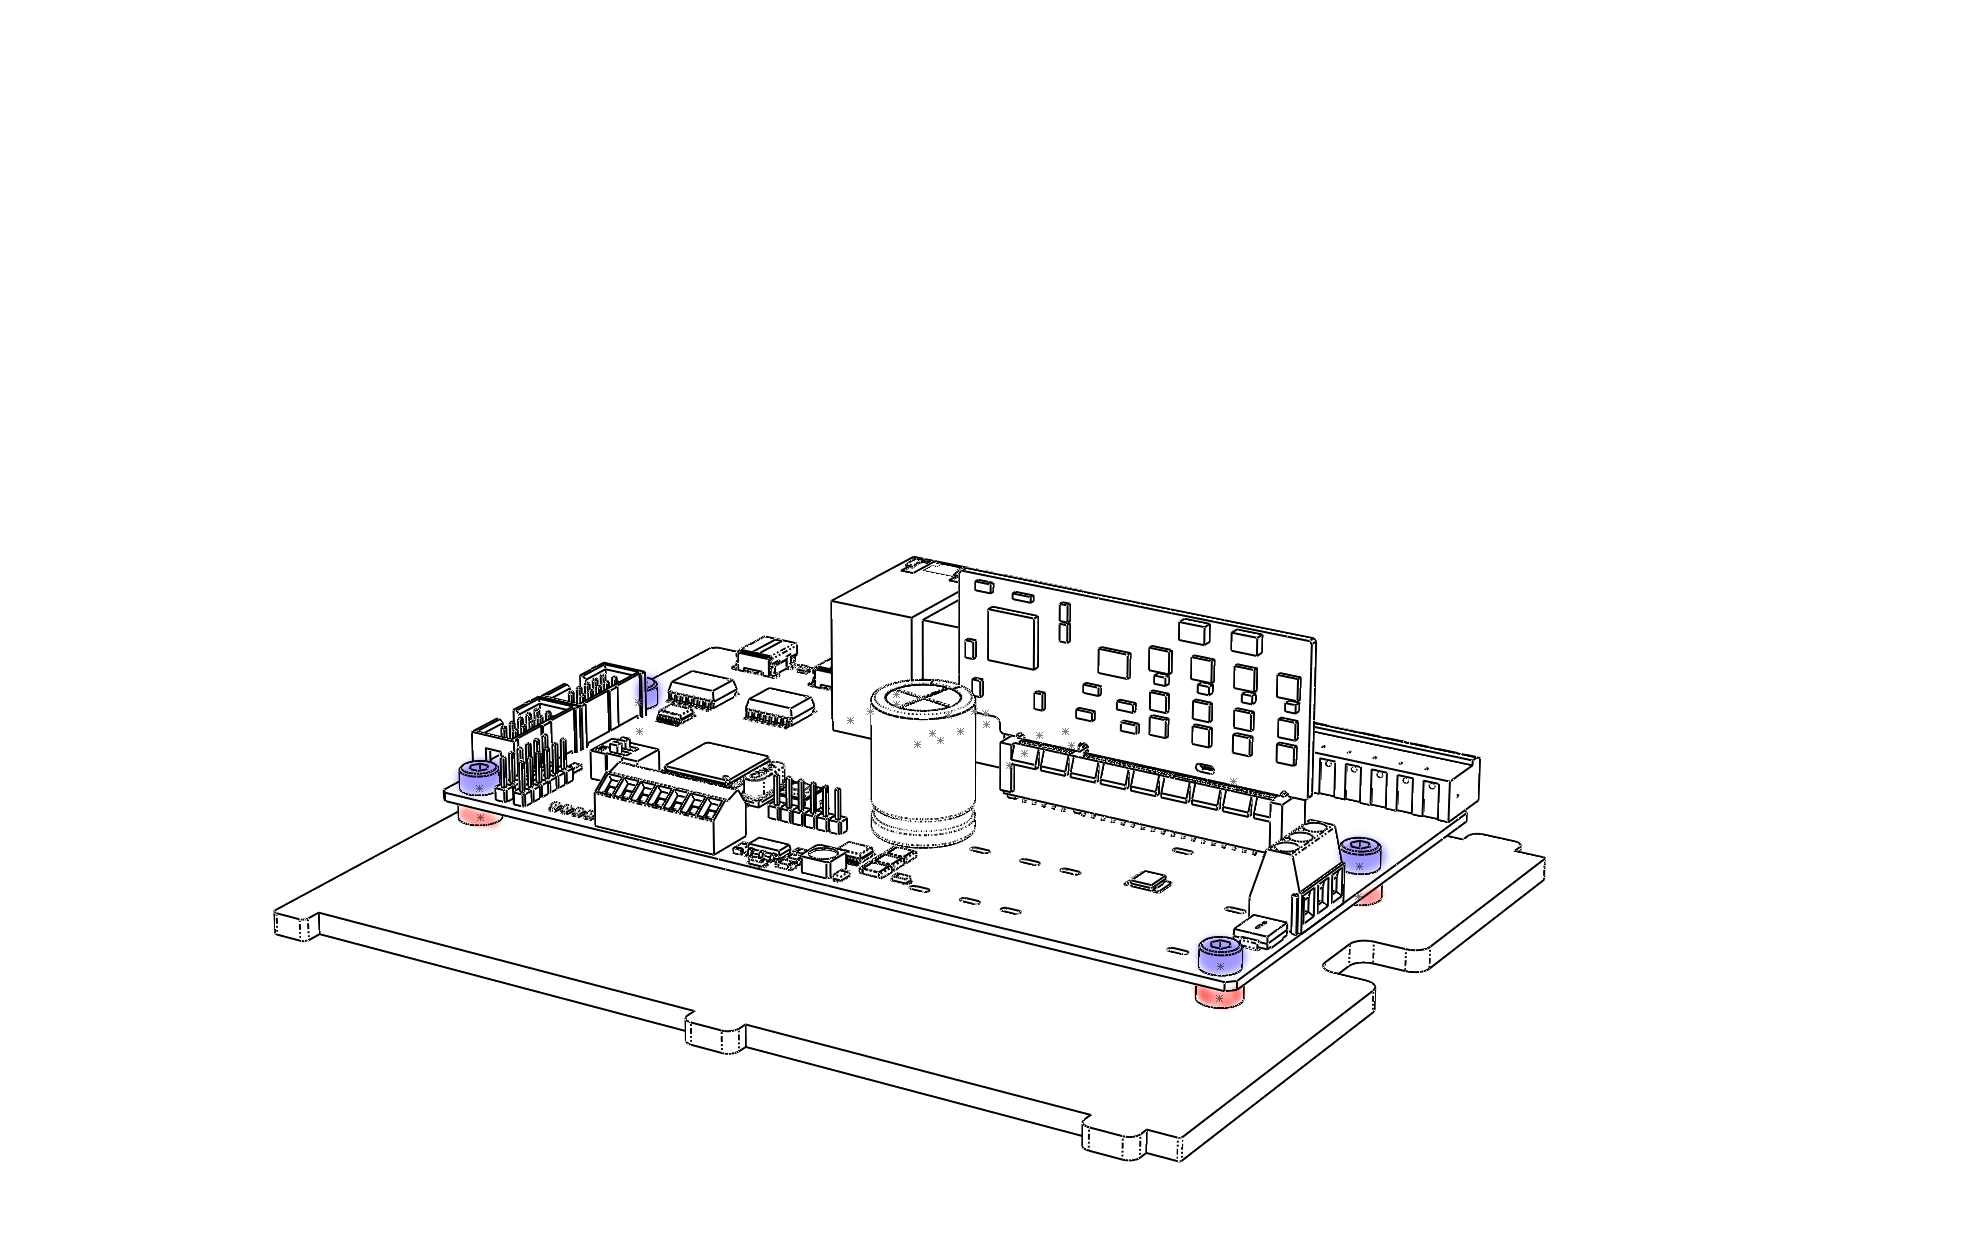
8) Attach the 80mm fan on the acrylic side piece with four M5x10 button head screws, use the photo as a reference on which way the fan should be aligned. This configuration sucks air to the case and blows it towards the IONI and through the power supply.
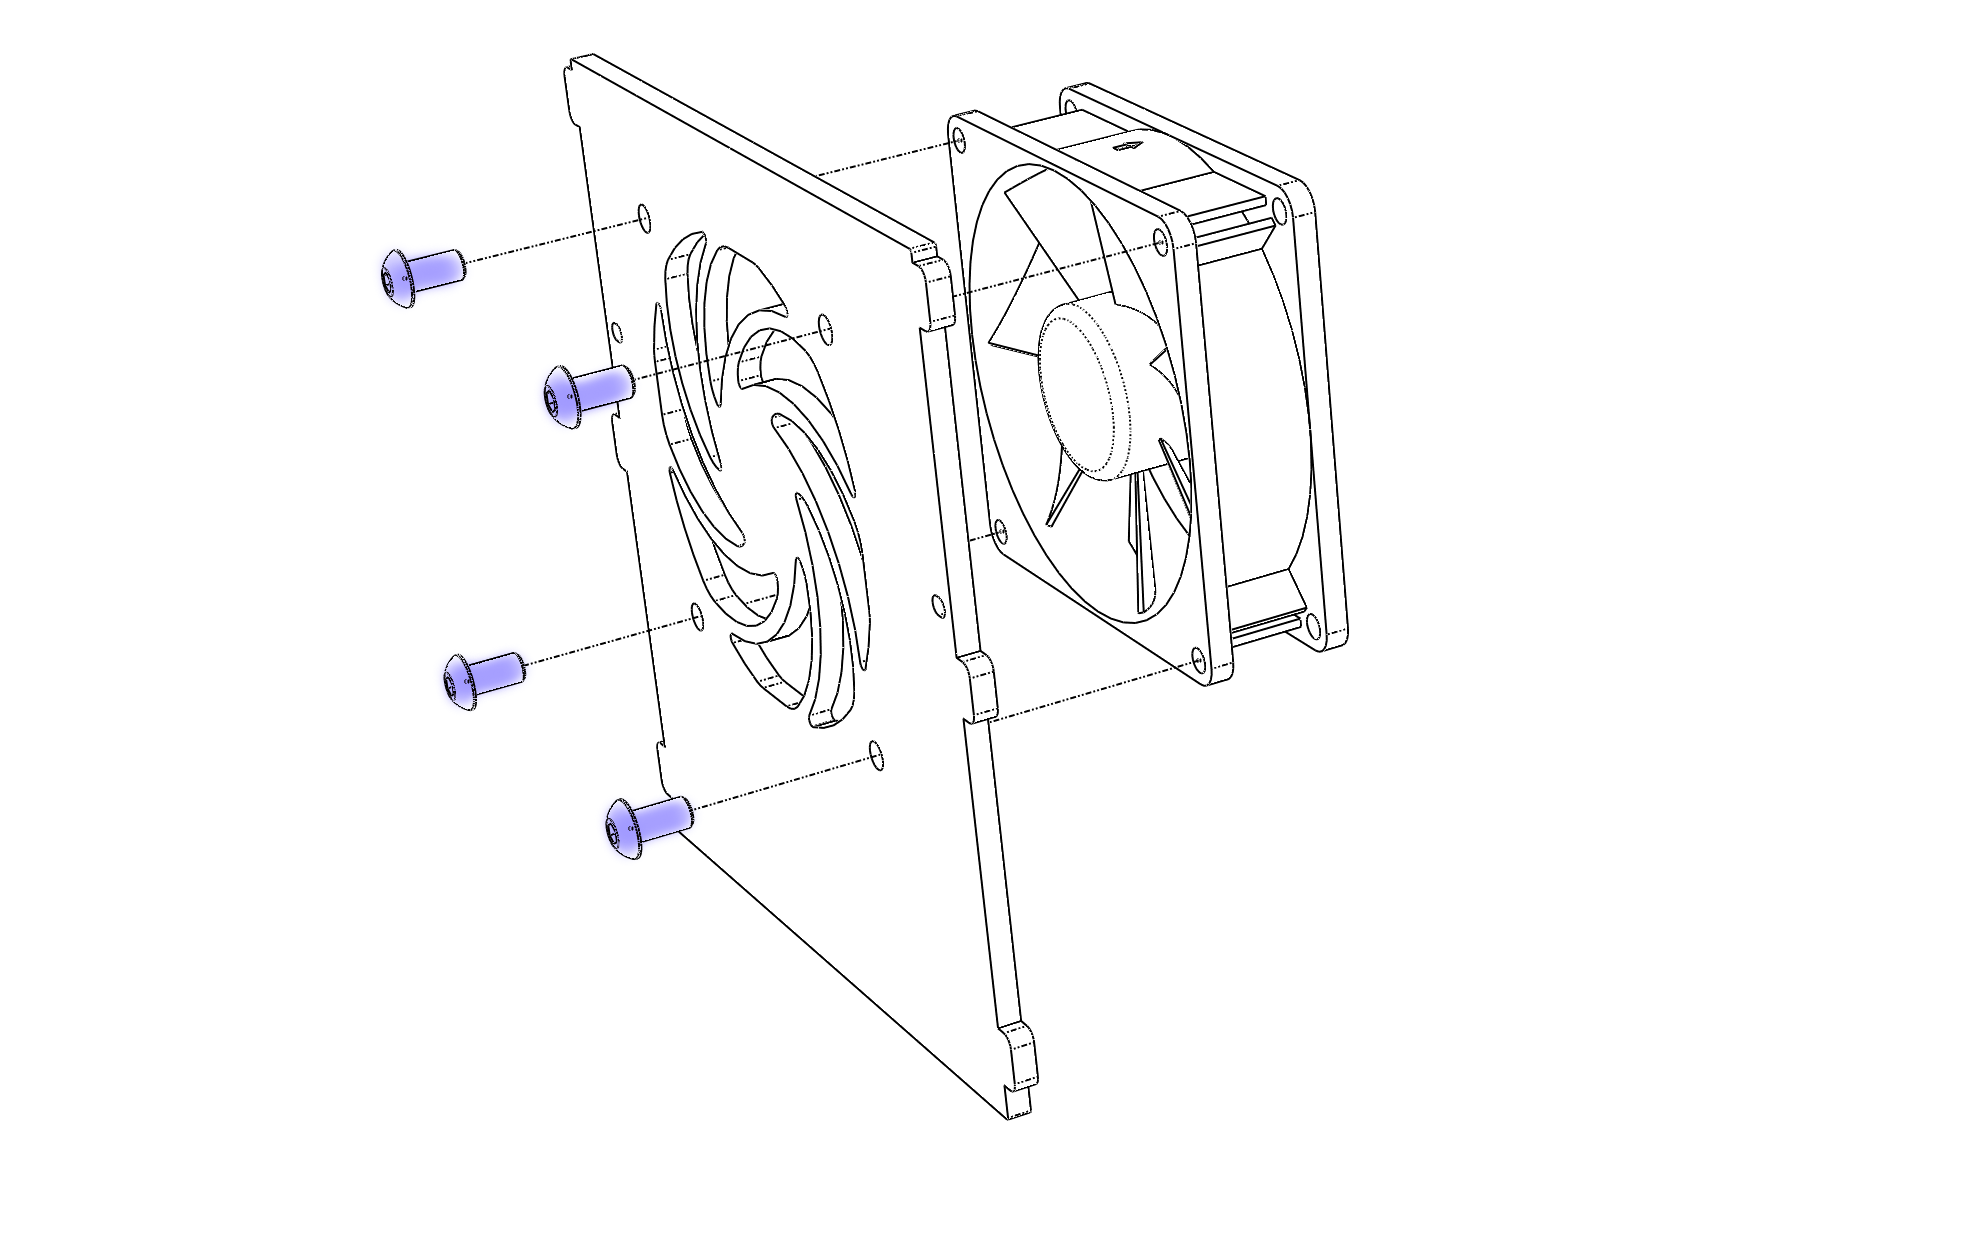
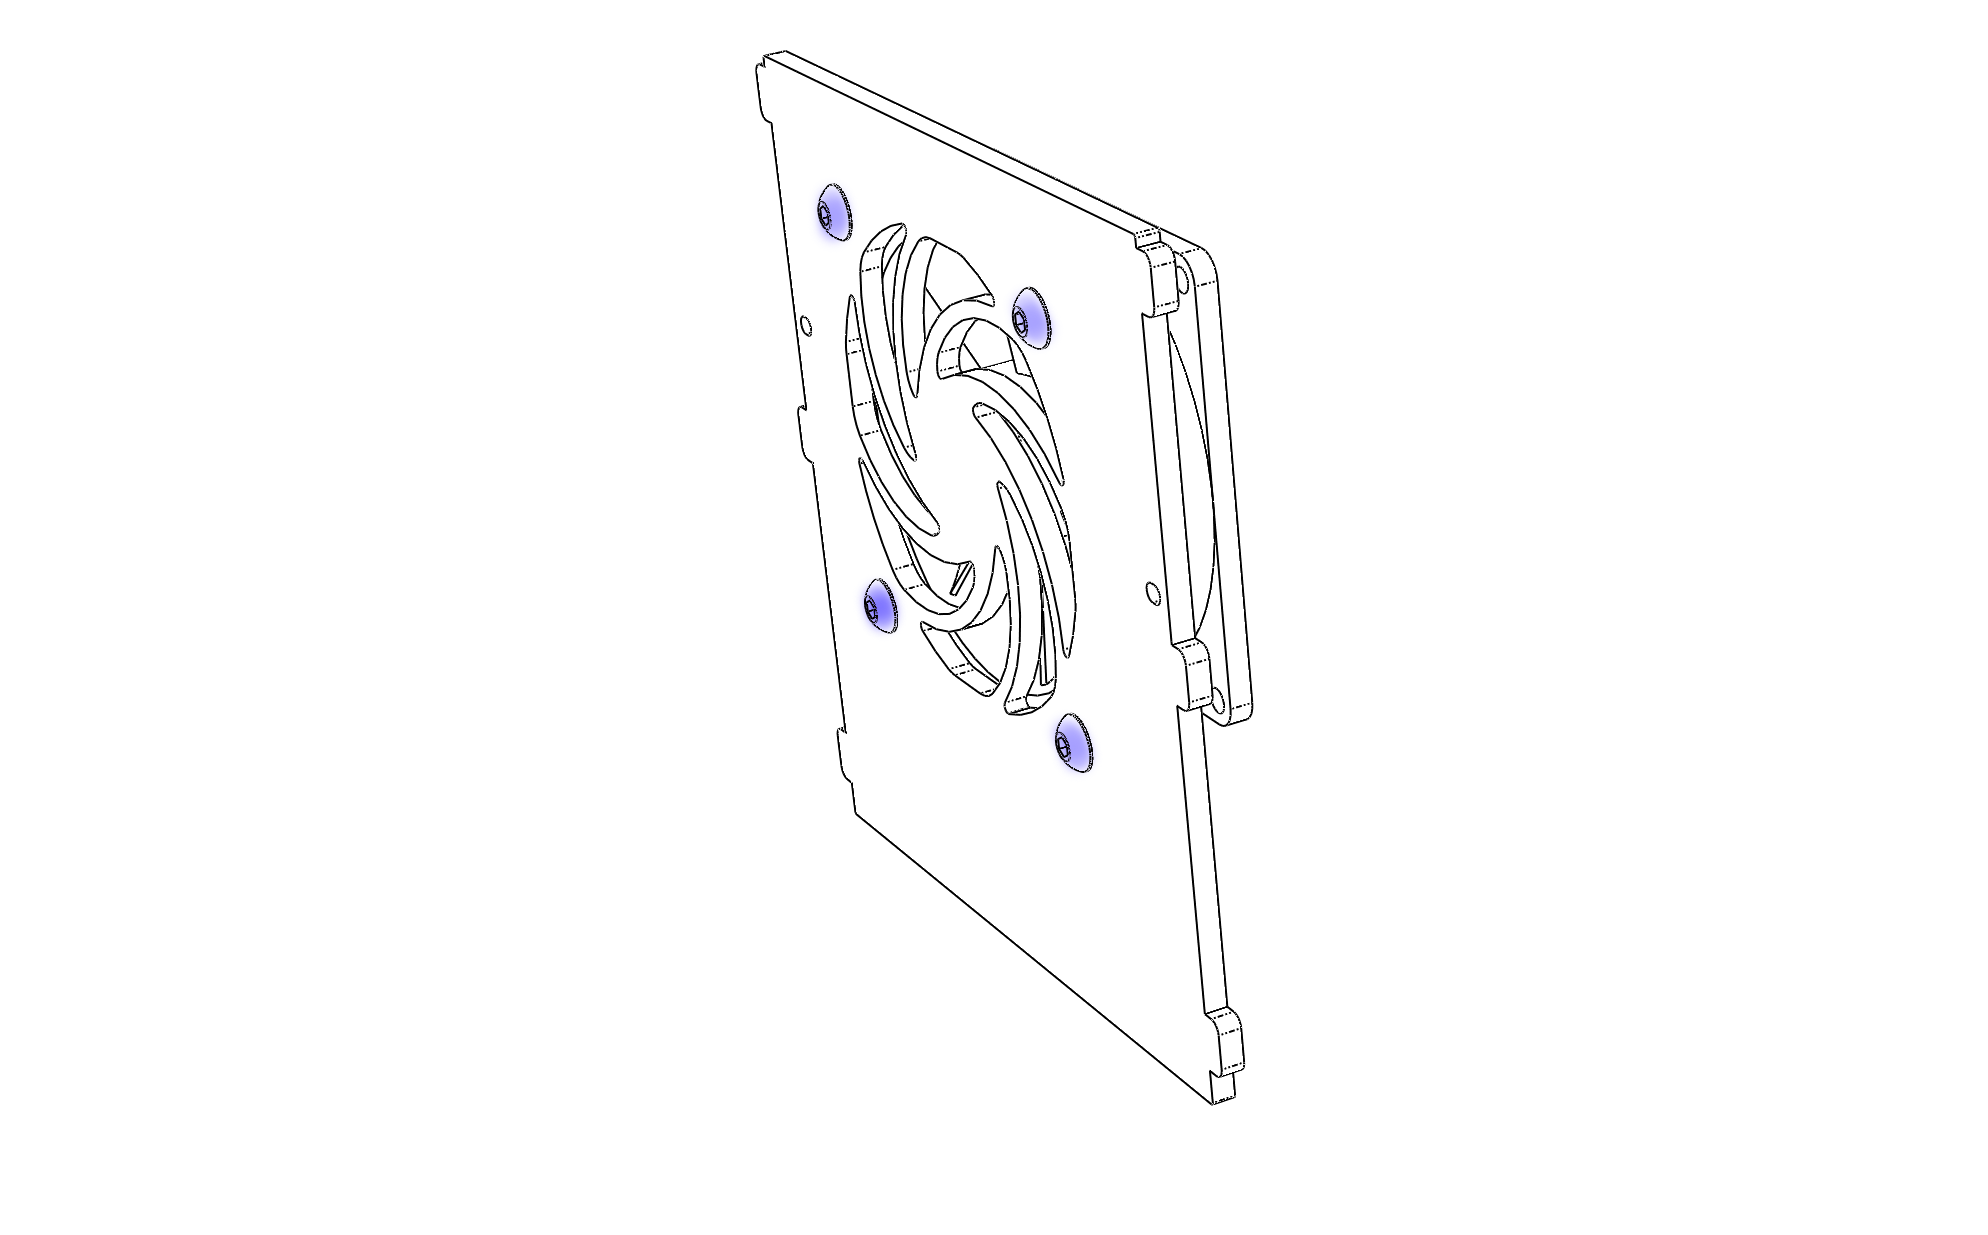
9) Slide the motherboard assembly on top of the power supply and into the slots on the back of the case.
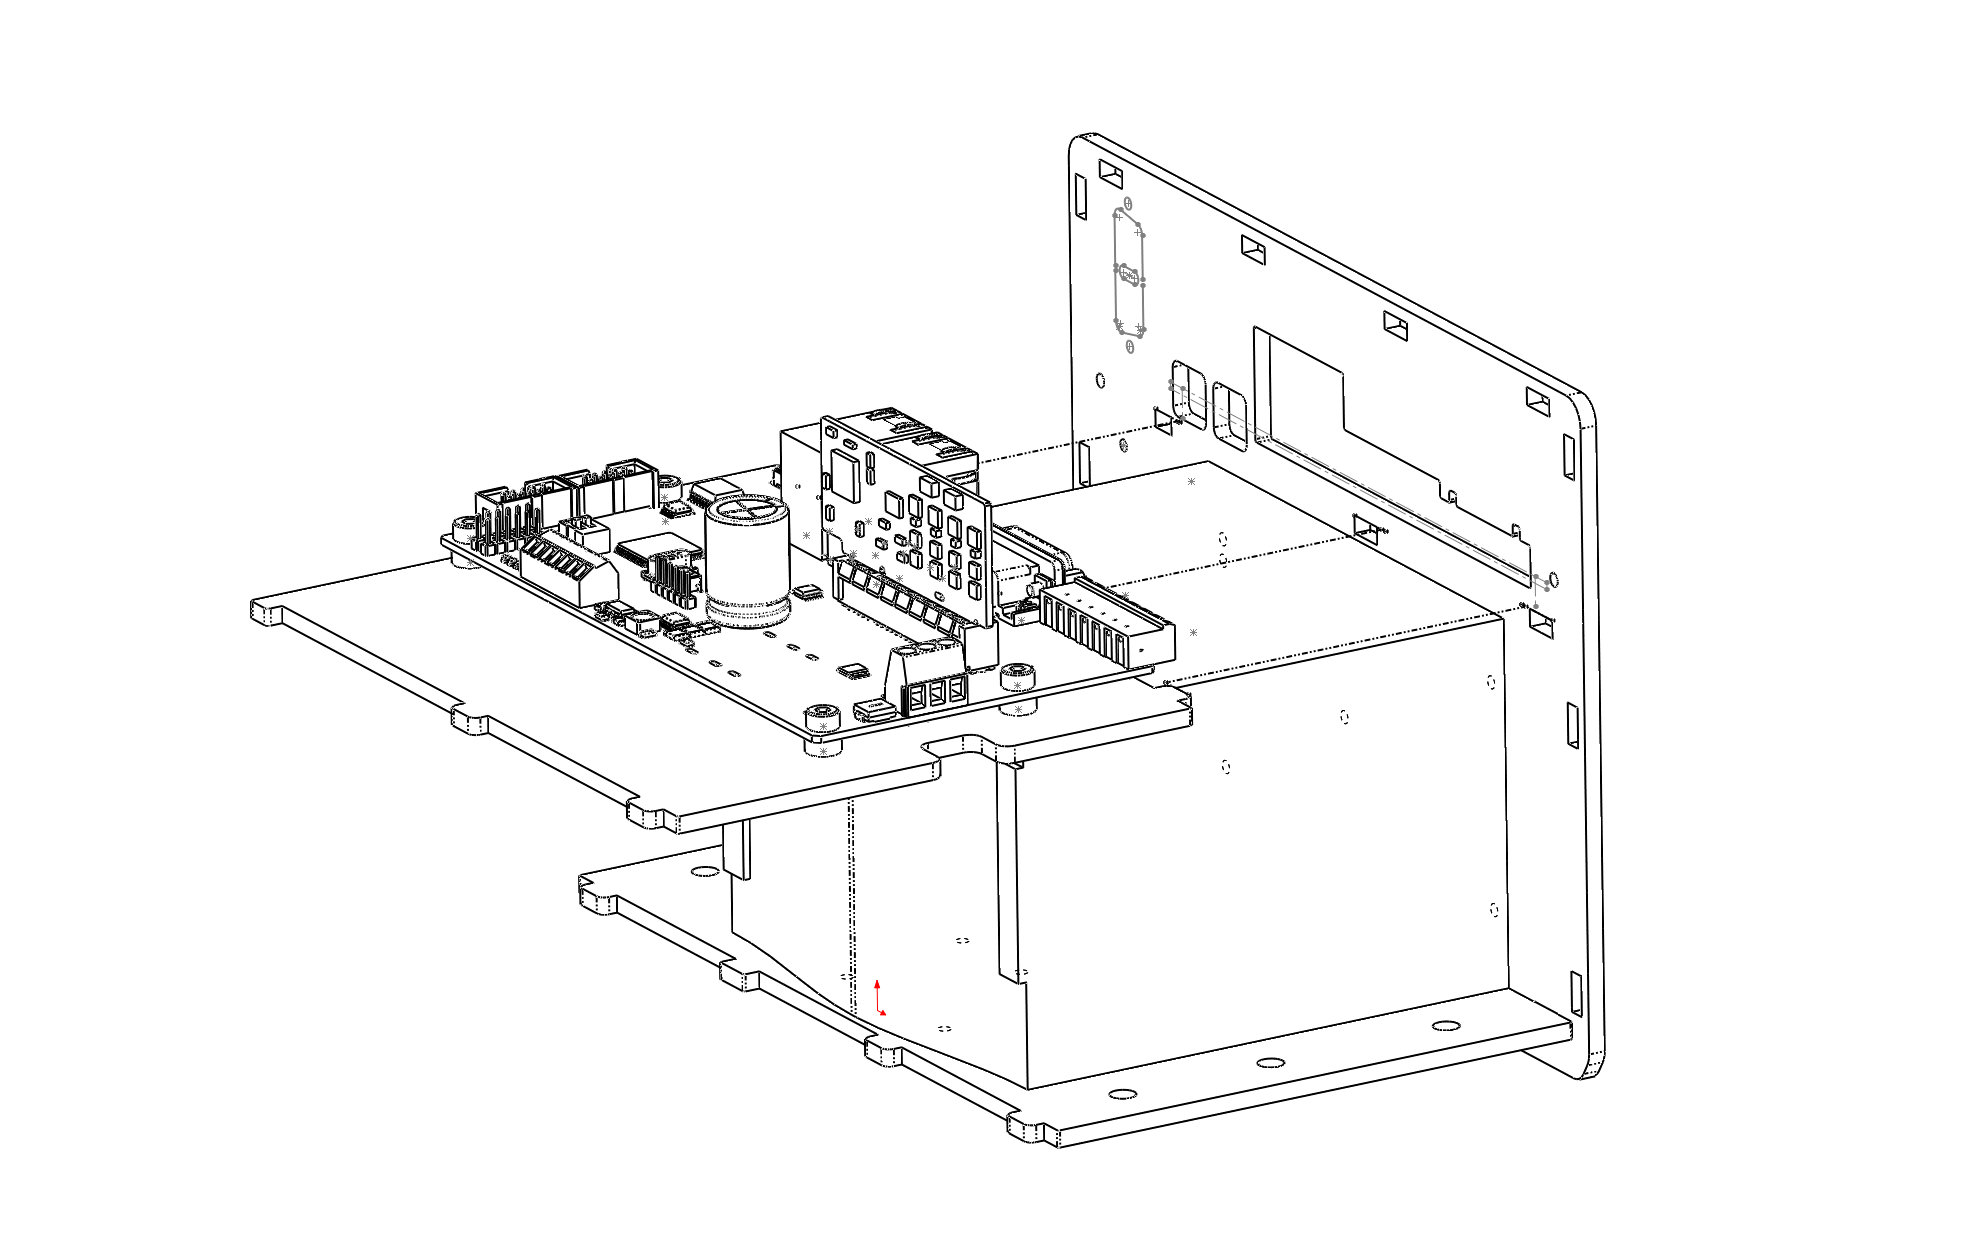
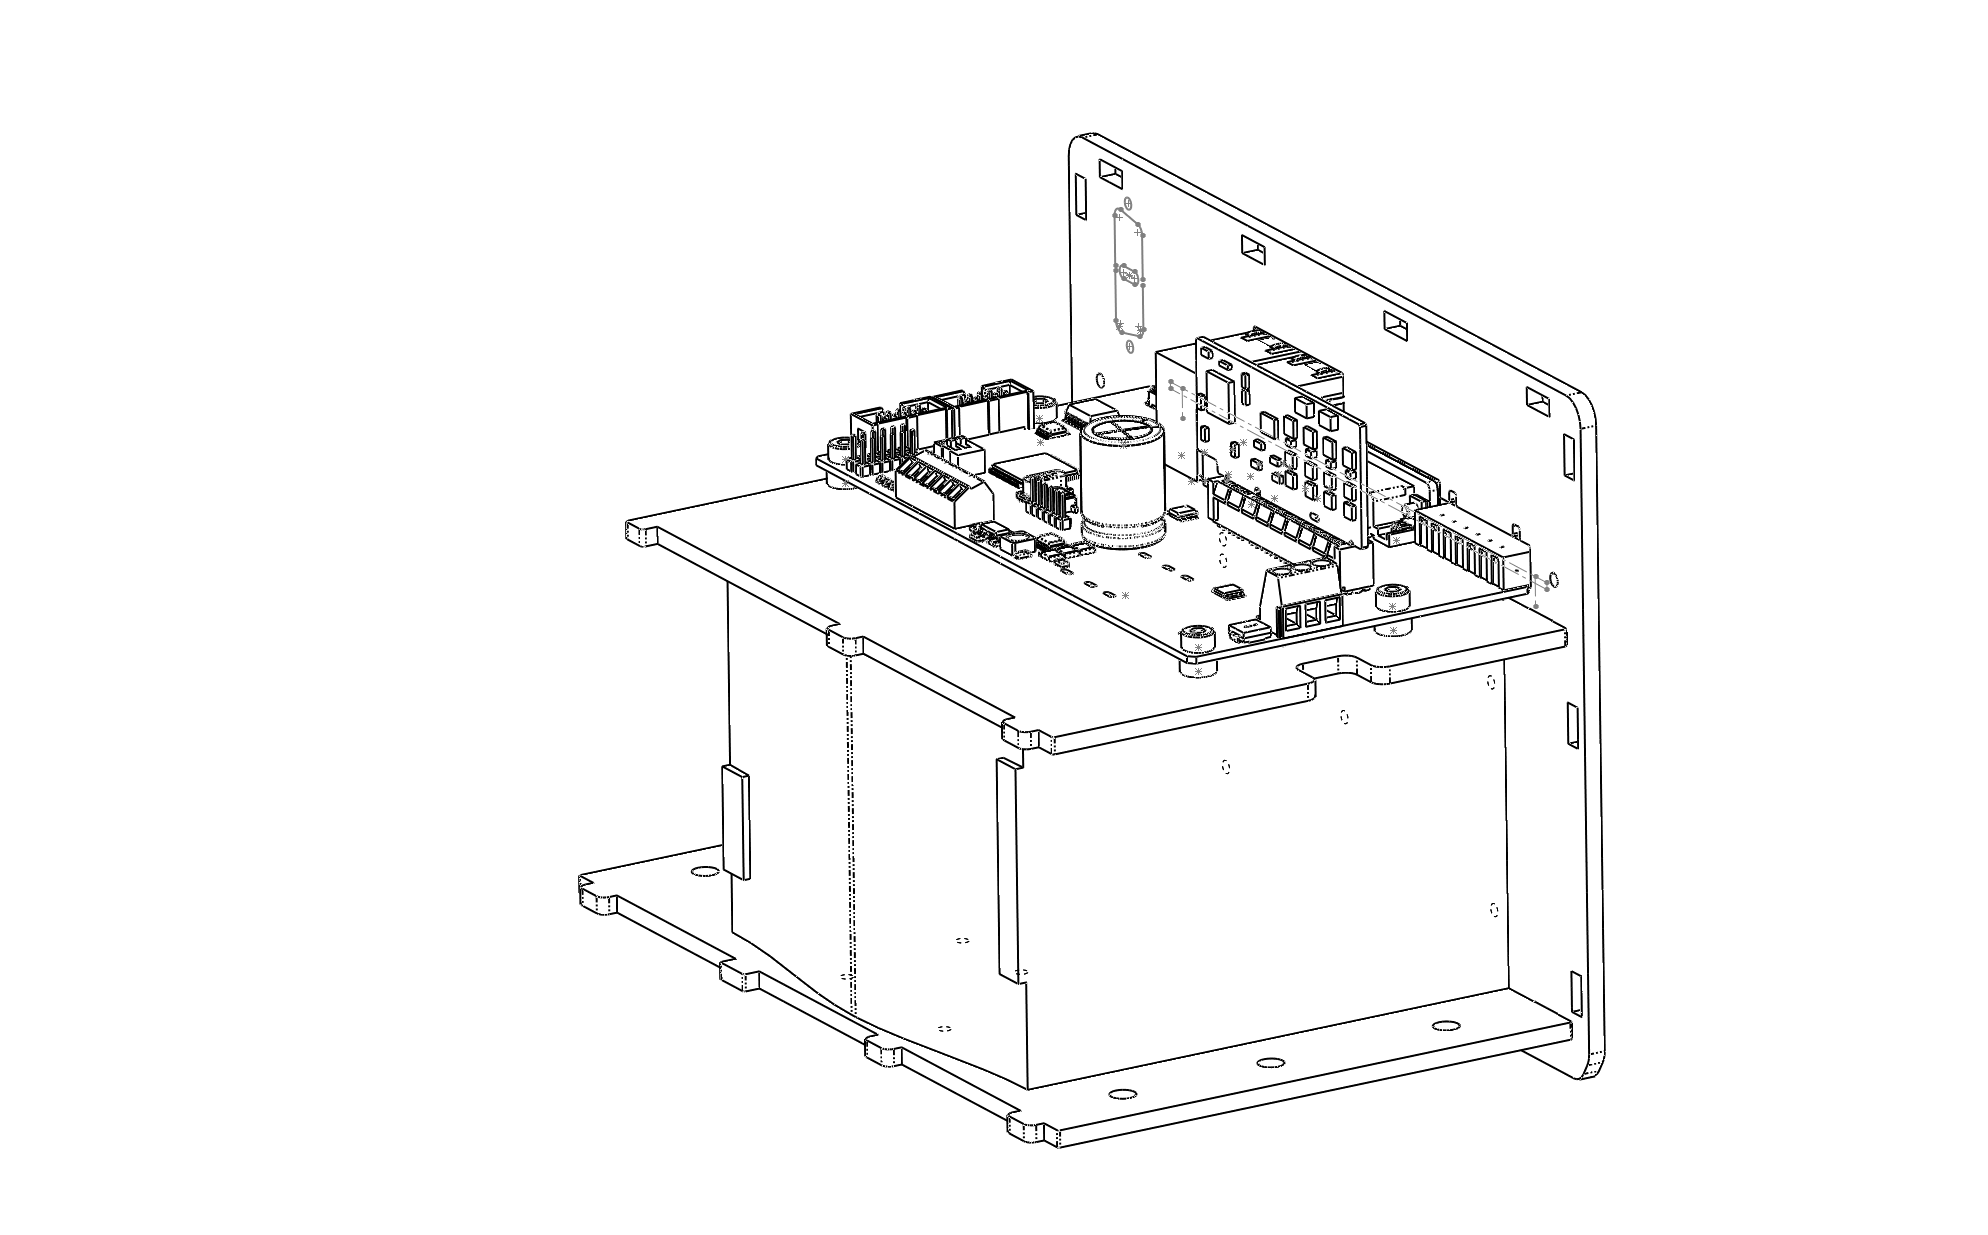
10) Attach positive (+48VDC), negative and grounding wires between the power supply output and motherboard terminals.
TODO: photo of 48V and grounding wires from PSU to SimuCUBE
11) Attach the fan side plate in place and attach the fan wires to the quick terminal on the motherboard.
TODO: photo of fan wires connected to the motherboard
12) Attach the two 10mm brass cubes to the acrylic front plate with M3x6 button head screws and align the holes as shown on the image.
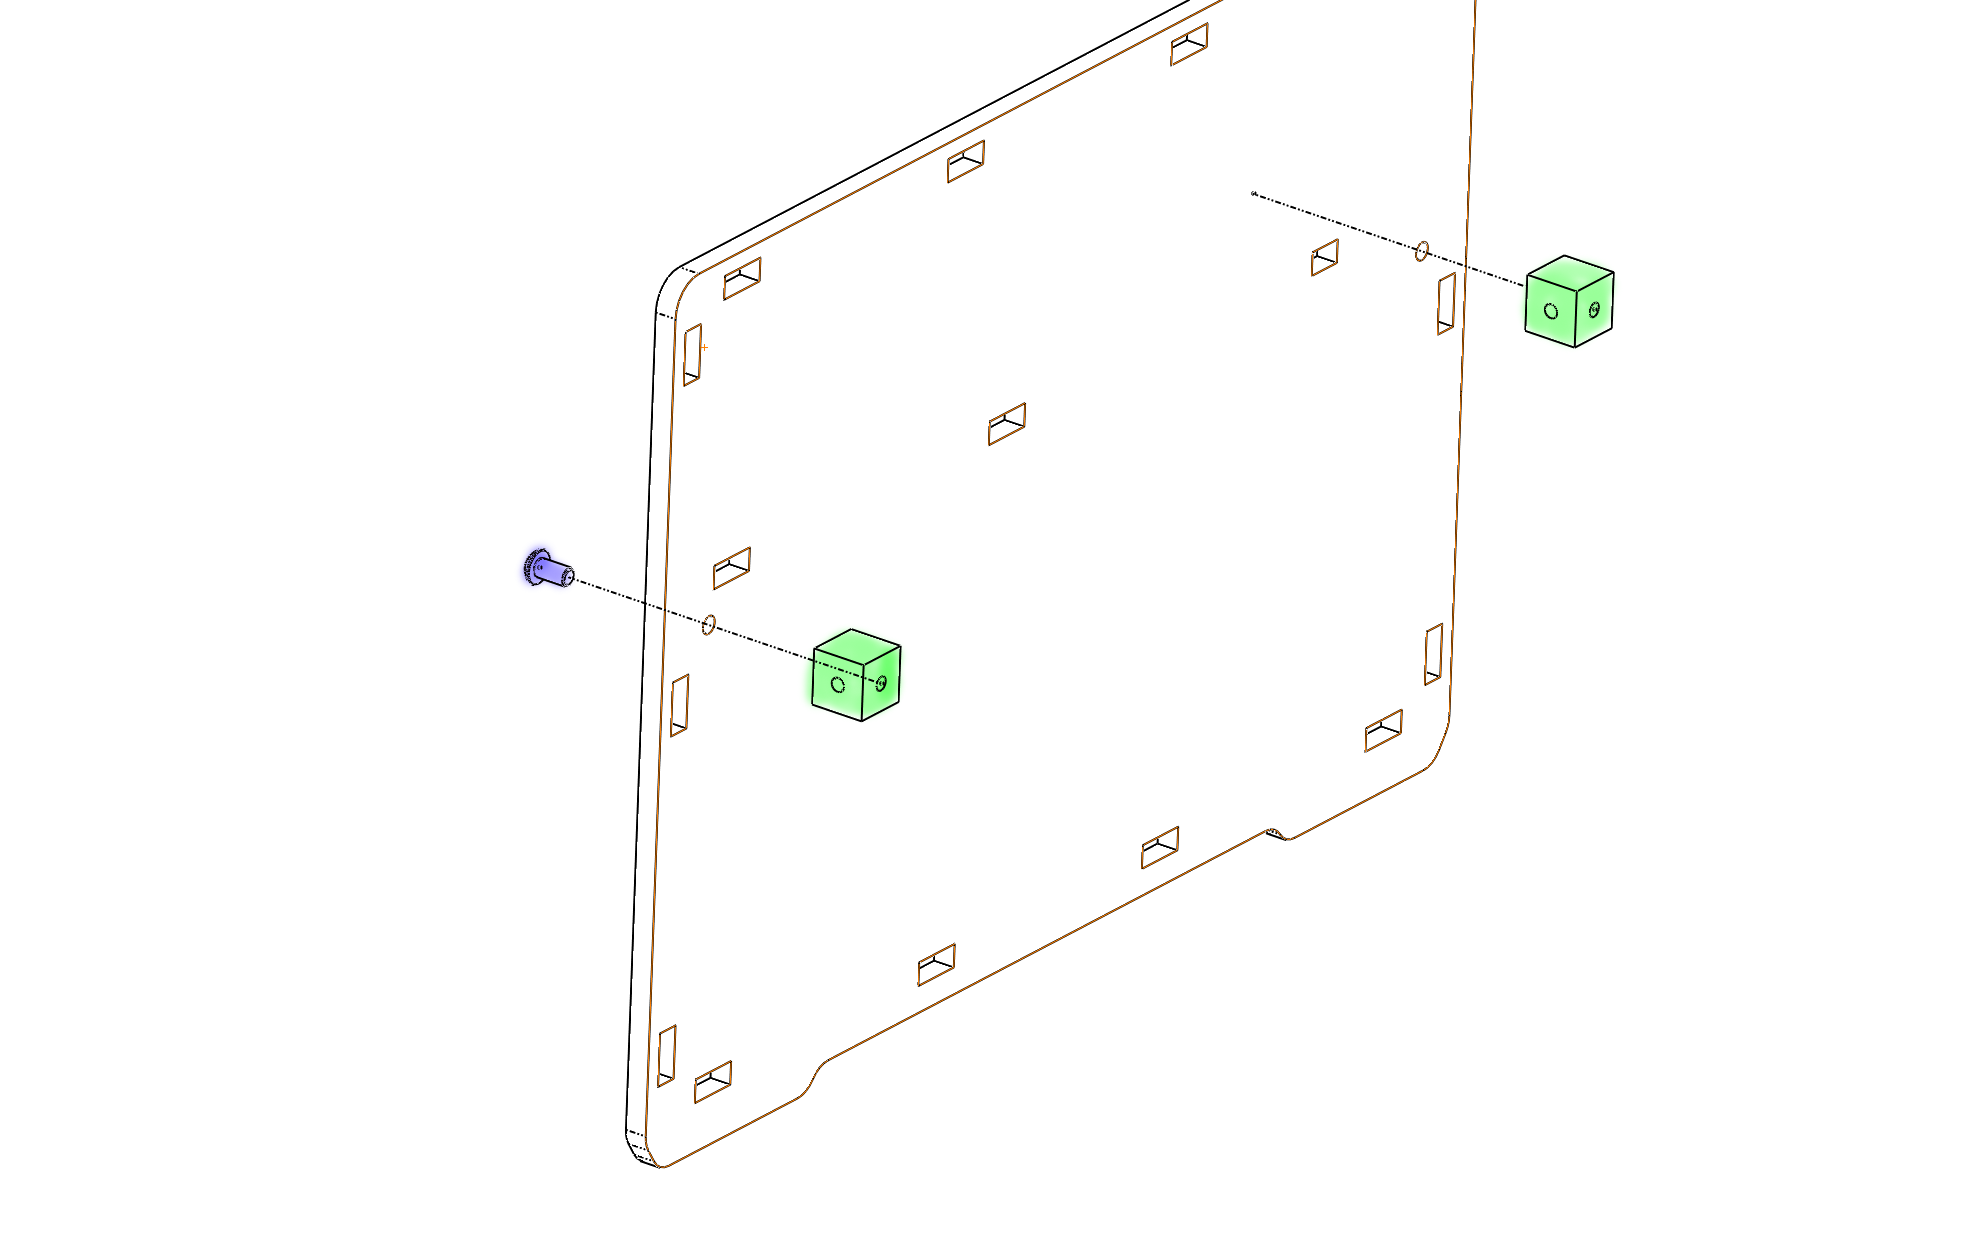
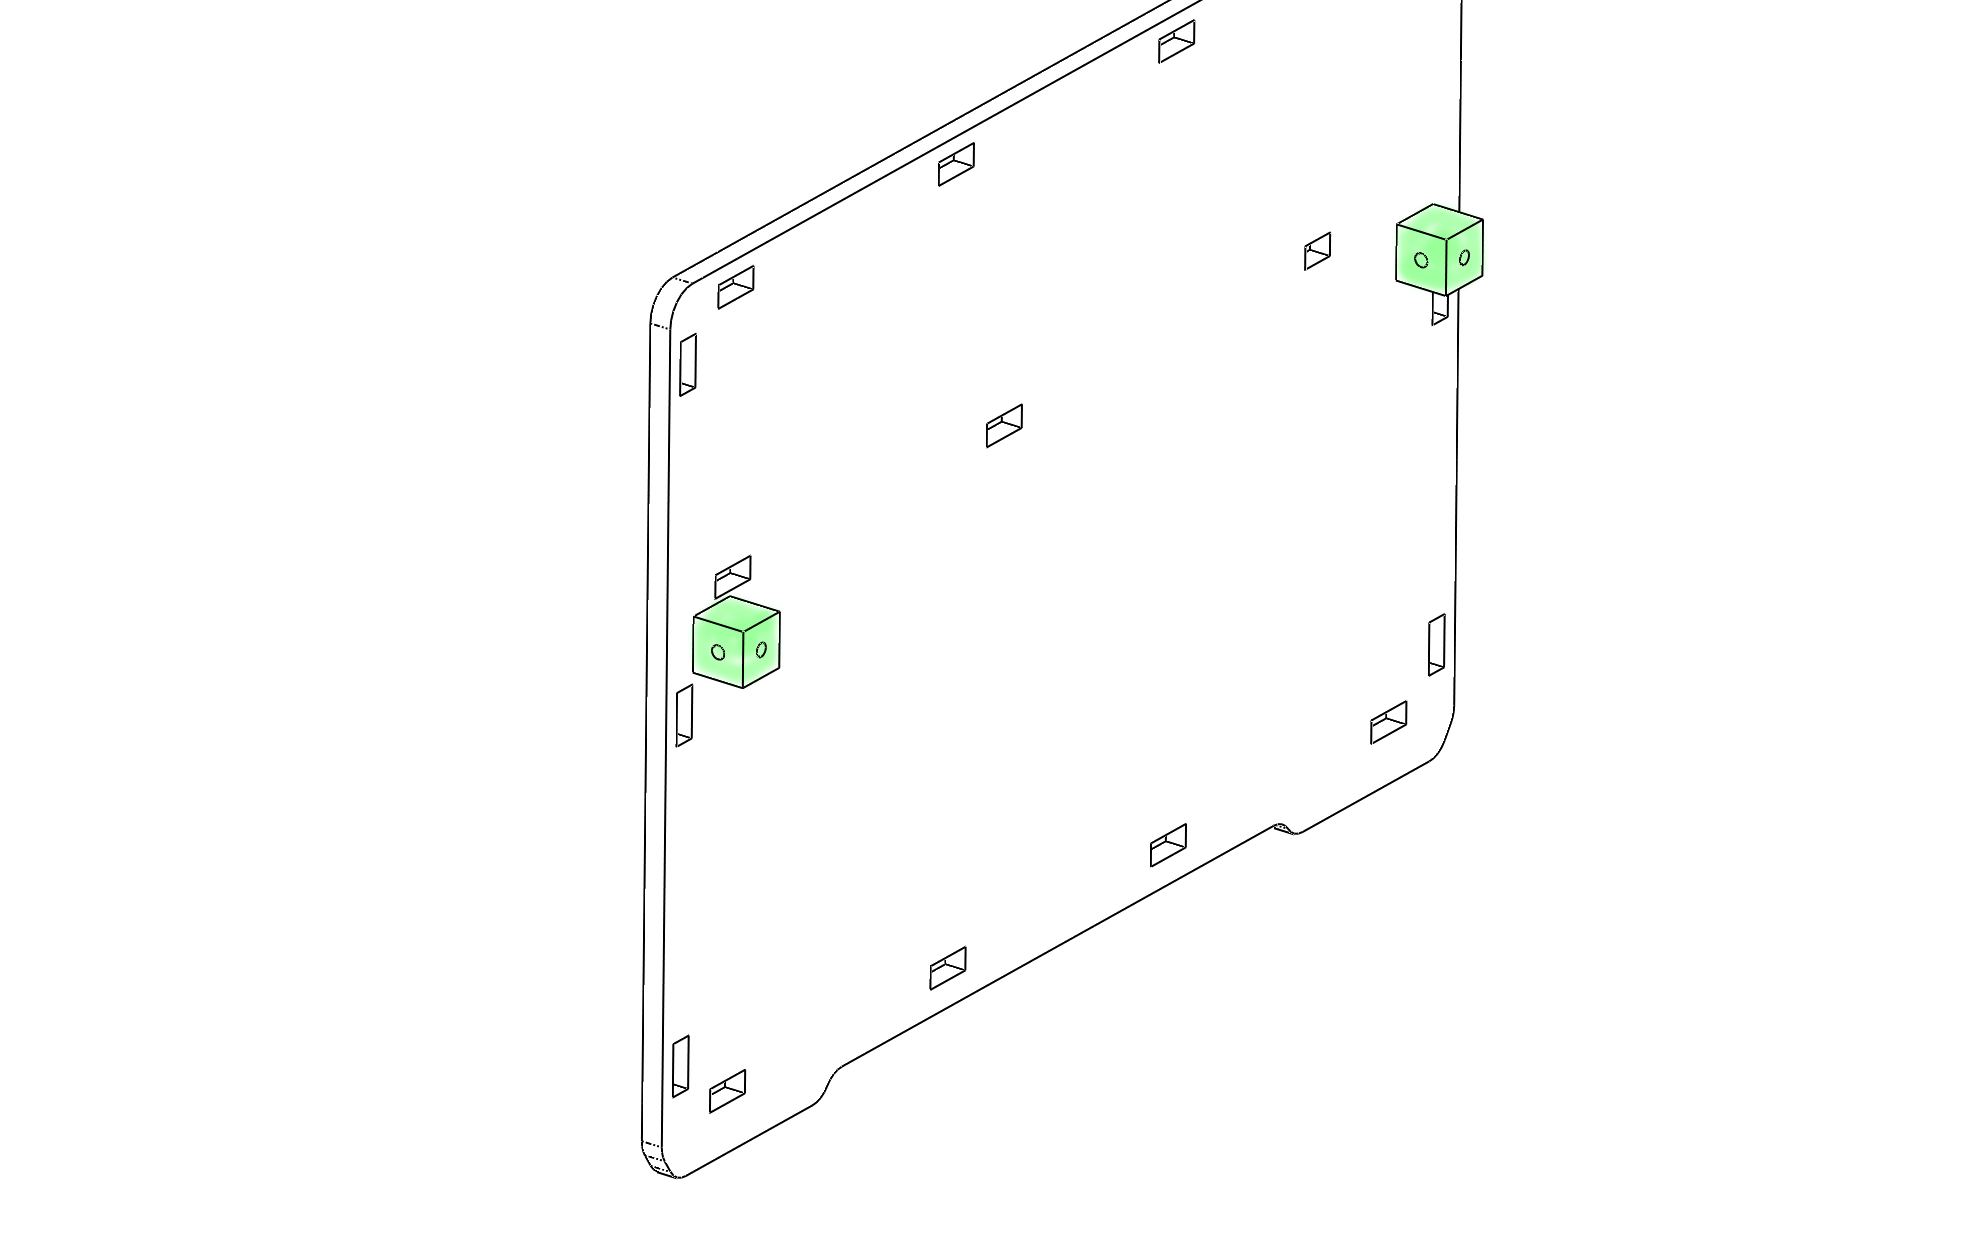
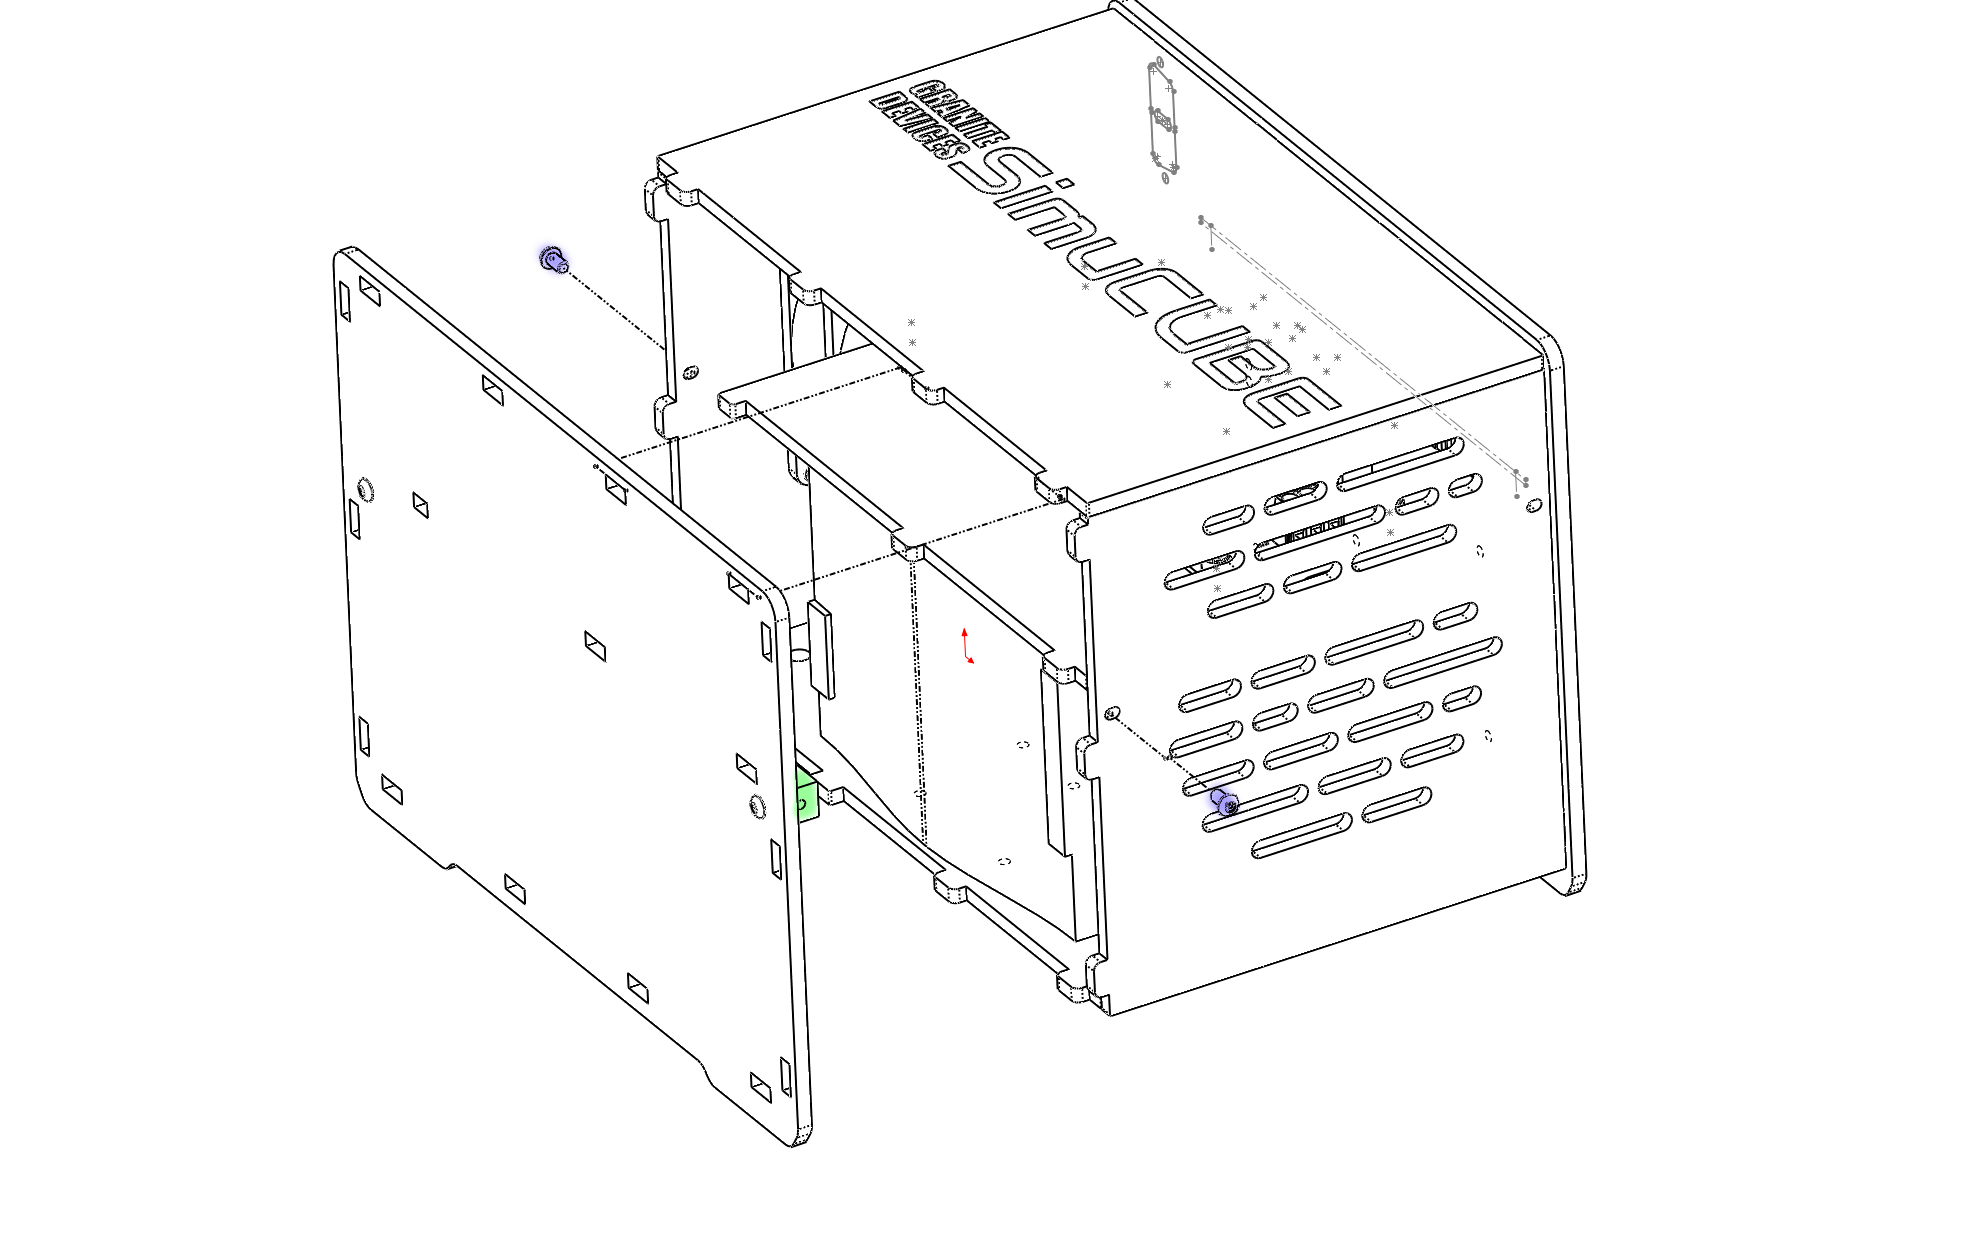
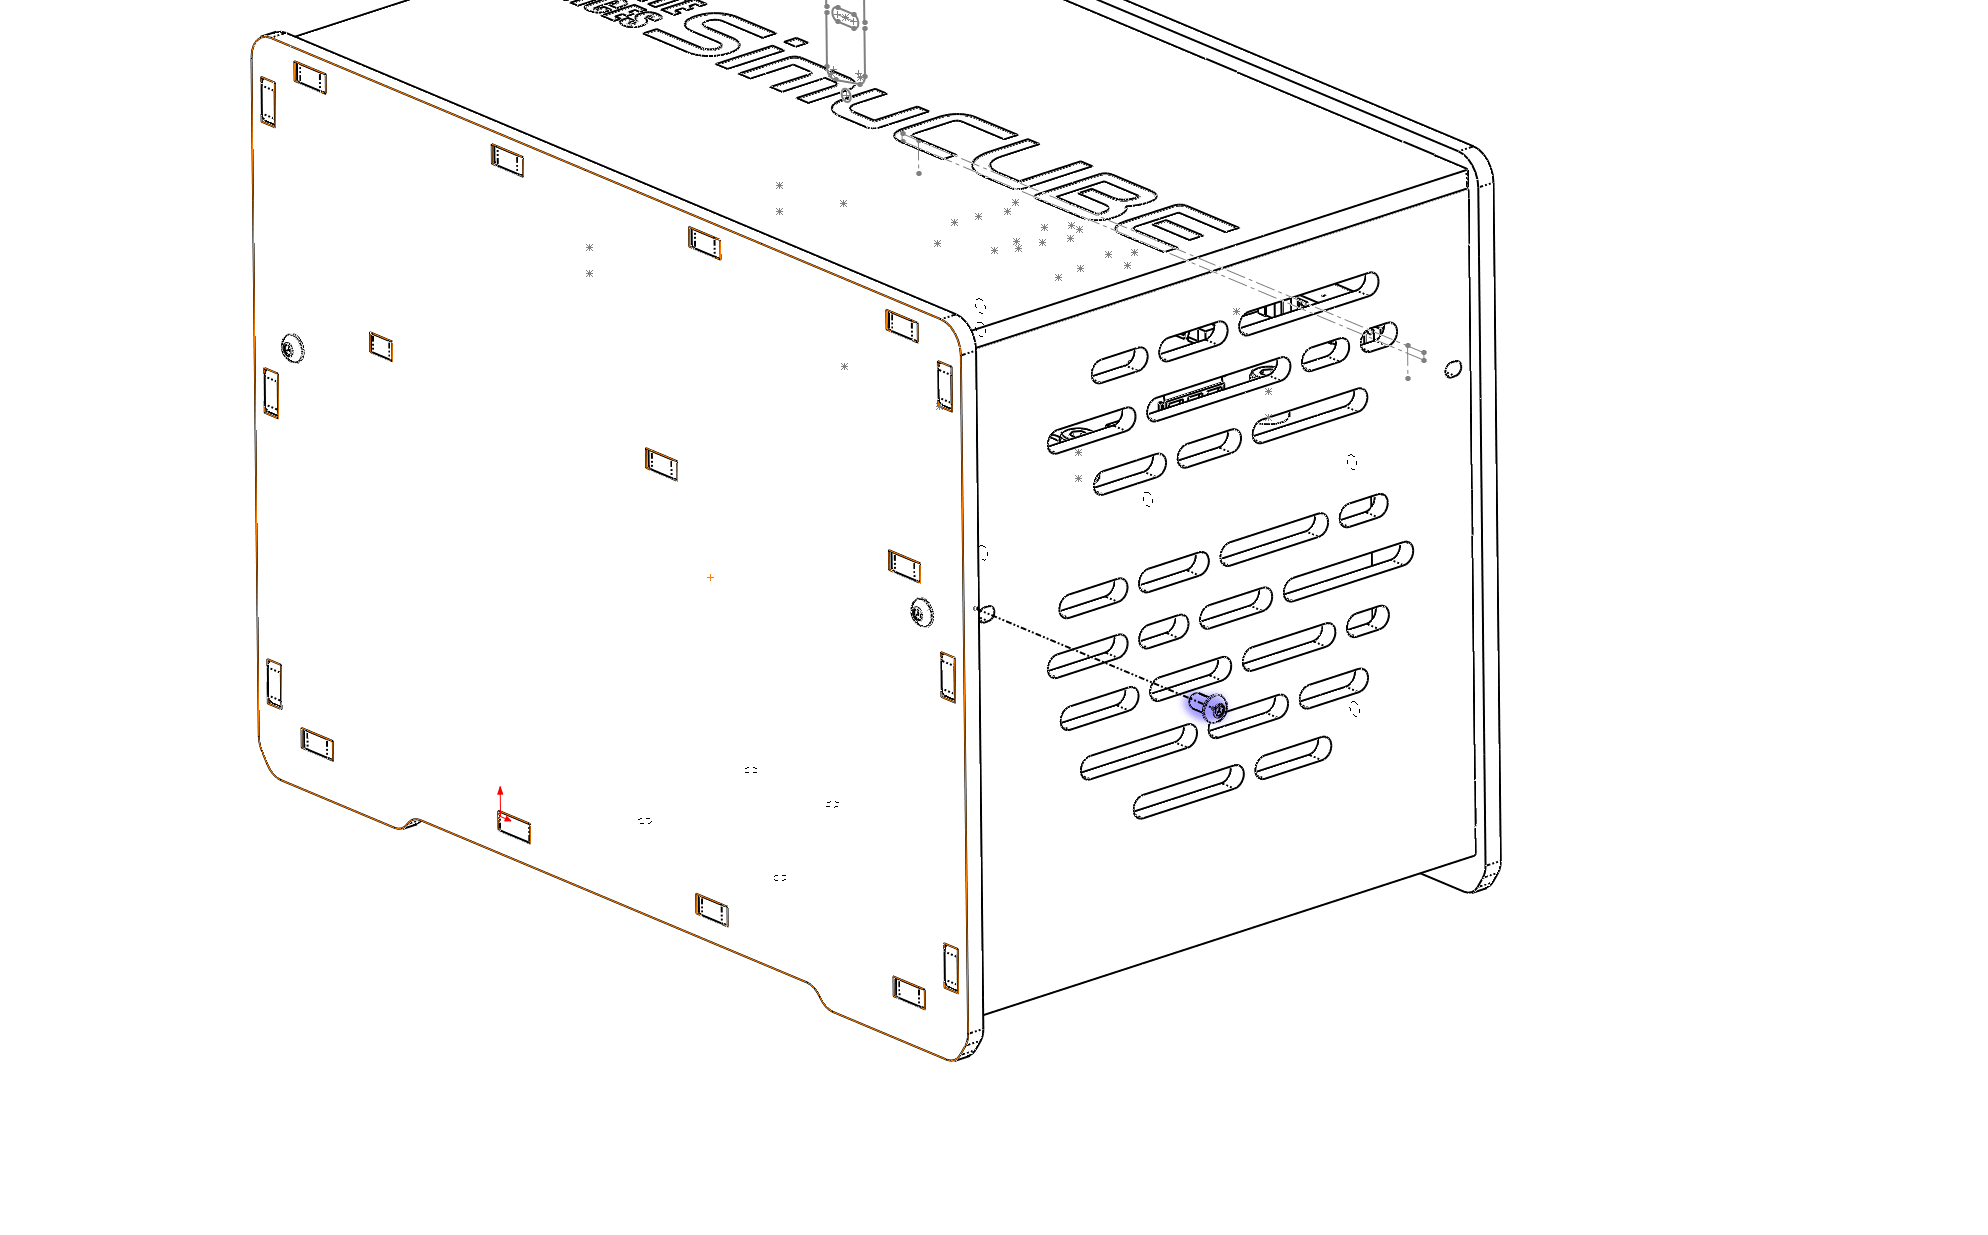
13) Attach the left exhaust panel and top panel with the logo to the case and carefully wiggle the front plate in place. Screw one M3x6 button head screw from either side to the 10mm brass cubes previously attached to the front plate.
TODO: photo of assembled system
