Difference between revisions of "Installing Qt SDK from scratch"
From Granite Devices Knowledge Wiki
| [checked revision] | [checked revision] |
m (Text replacement - "\[\[([A-Z]{2,3})\]\]" to "{{param|$1}}") |
m (Text replacement - "{{param|GUI}}" to "GUI") |
||
| Line 16: | Line 16: | ||
{{tip|If something goes wrong in configuration and project refuses to compile even if the code is fine, you may start over by deleting the ''somefile.pro.user'' file from the project folder and Qt Creator will show up the configuration dialog again.}} | {{tip|If something goes wrong in configuration and project refuses to compile even if the code is fine, you may start over by deleting the ''somefile.pro.user'' file from the project folder and Qt Creator will show up the configuration dialog again.}} | ||
===Editing=== | ===Editing=== | ||
| − | To create new controls in the | + | To create new controls in the [[GUI]], expand Forms from the projects pane and doubleclick the .ui file. In this example we add a button to the GUI: |
#Double click '''.ui''' file to open a UI editor <br/>[[File:Qt edit ui.png]] | #Double click '''.ui''' file to open a UI editor <br/>[[File:Qt edit ui.png]] | ||
#Drag'n'drop a '''Push button''' from left side list to the UI | #Drag'n'drop a '''Push button''' from left side list to the UI | ||
Latest revision as of 19:59, 28 August 2015
Installing open source Qt with compiler and IDE for Windows may be done by following the steps below.
Installation steps[edit | edit source]
- Navigate to http://www.qt.io/download-open-source/ and download the latest Open Source Qt installer.
- Launch the installer and make sure that a Qt library (4.x or 5.x), Qt Creator and MinGW has been selected
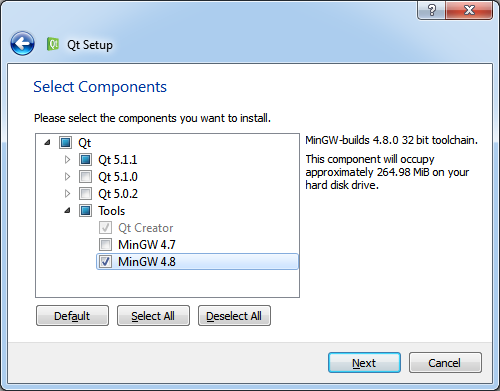
- Click next to begin installation
- All done! Launch Qt Creator

Using an example project[edit | edit source]
Opening and building[edit | edit source]
- Open the project (.pro) file from Qt Creator
- If the project is opened first time, a following style dialog will show up
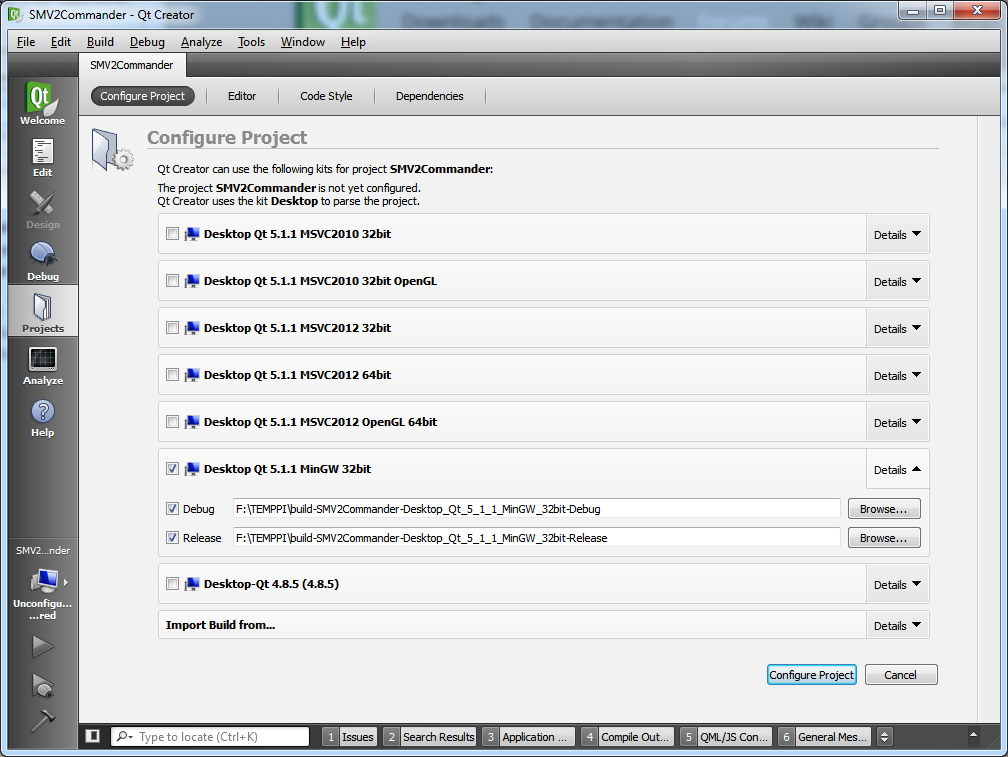
- Check that correct Qt version has been ticked. In this case we installed MinGW compiler, so choose it. Untick all other Qt versions.
- Click Configure project.
- Now the project is open and may be browsed and edited
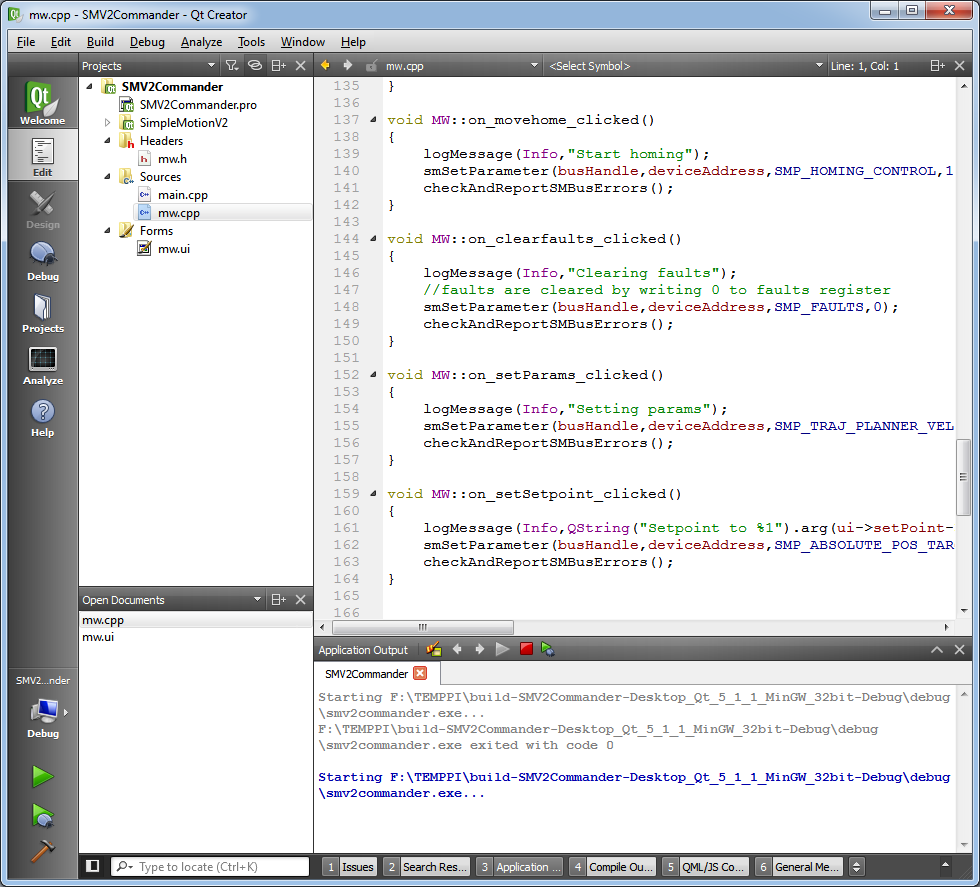
- Hit Ctrl+B to build a project or Ctrl+R to run it


| If something goes wrong in configuration and project refuses to compile even if the code is fine, you may start over by deleting the somefile.pro.user file from the project folder and Qt Creator will show up the configuration dialog again. |
Editing[edit | edit source]
To create new controls in the GUI, expand Forms from the projects pane and doubleclick the .ui file. In this example we add a button to the GUI:
- Double click .ui file to open a UI editor

- Drag'n'drop a Push button from left side list to the UI
- Double click the new button to the change the text from "Push button" to anything you want on it. Also rename the object from the right side pane (objectName line).
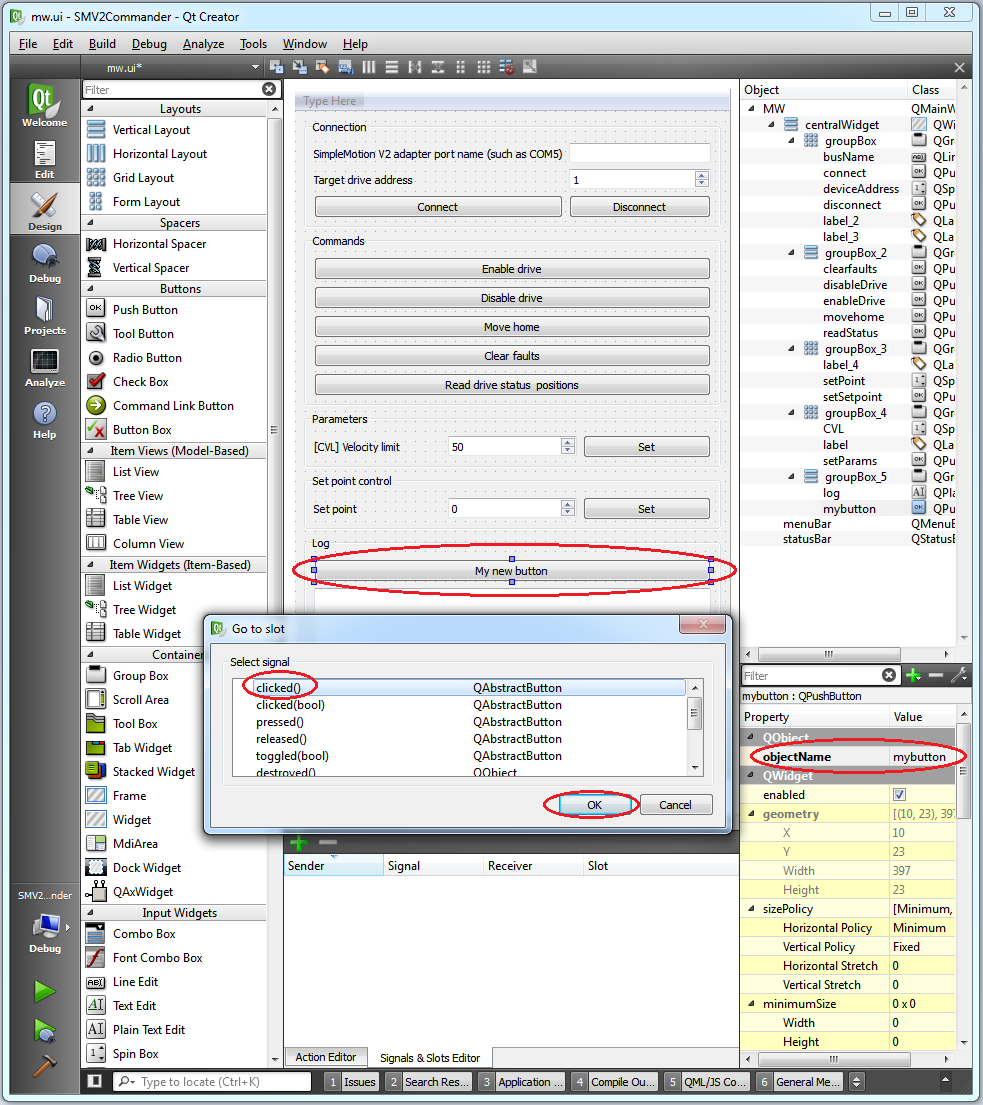
- Select the button and right-click it to and choose Go to slot...
- Choose clicked() from the list and click Ok.
- A new function will be created to the code. The code will be executed on when the button is clicked.


The generated code looks like:
void MW::on_mybutton_clicked()
{
}