Commissioning of KANZ servo motors

Wiring[edit | edit source]
Wire preparation[edit | edit source]
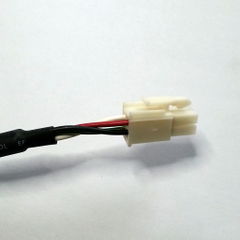
KANZ motors come with pre-assembled cables for Argon servo drive (encoder and motor part). However, some motor models include excessive 4-pin terminal for motor part that needs to be stripped away.
The excessive 4-pin connector that need to be cut away. Stripping 3-5 cm of black outer insulation is recommended to make space for EMI suppression cores.
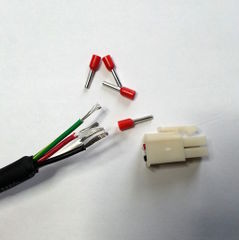
Strip wire ends. Cutting U,V,W 1-2 cm shorter than PE is recommended for safety (to make PE the last to disconnect if cable pulled by force).

Optional, but recommended, ferrule crimping of wire ends.

Minimum length of wire ends to fit single EMI suppression core to leads. Note: it recommended to strip outer insulation before crimping.


| Ensure that insulation of inner wires have not been damaged in the process of wire stripping and that there is no loose wire strands |
Connecting[edit | edit source]
First, ensure that you have understood Argon user guide wiring section and especially earthing section before proceeding with installation.
Pre-made encoder cable plugs directly into Argon J1 connector and motor U, V, W and PE connect to J4 terminal to their respective positions. Insert EMI suppression cores as illustrated below:

Parameterization[edit | edit source]
For parameterization, make sure you understand Argon drive parameterization basics. To speed up commissioning of motor, pre-made base configuration files are provided for stocked servo motors. Instructions for using the files:
| When loading settings, have drive disconnected from AC power for safety reasons. Ensure that all settings and wirings (including emergency stopping) are ready before connecting AC power. |
- Download KANZ motor configuration files: Media:KANZ Argon base settings.zip
- Connect drive to Granity (instructions)
- Click Load settings from file and open corresponding configuration file. Choose the file that is most has similar beginning with motor mode (i.e. KANZ04... file for KANZ-04BF8N2 motor).
- Click Save settings on drive non-volatile memory and if choose Apply and Restart drive buttons in the dialogs that may appear
- After drive restarts, connect again to drive and review all settings. For first testing safety it is recommended to reduce current limits Peak current limitMMC and Continuous current limitMCC to a lower value (such as 20% of rated values) in order to limit motor torque if unexpected motion takes place. Also set control mode Control modeCM as required by end application.
- After all Ok, click Apply settings and you're ready to connect AC power for first tests.
- Go to Testing page and begin motor tuning according to Servo motor tuning guide
| Pre-made motor configuration files may have significantly different motor resistance Coil resistanceMR and inductance Coil inductanceML values compared to motor data sheet. Pre-made files are hand-optimized to give better performance than entering values from data sheet, so it is recommended to leave these values untouched. |
In no event the Product Information or parts hereof shall be regarded as guarantee of conditions or characteristics. The Product Information or any part thereof may also not be regarded as a warranty of any kind. No liability of any kind shall be assumed by Author with respect to Product Information or any use made by you thereof, nor shall Author indemnify you against or be liable for any third party claims with respect to such information or any use thereof.
As content of this Wiki may be edited by user community, Granite Devices Oy or it's affiliates do not take any responsibility of the contents of this Wiki. Use information at your own risk. However, Granite Devices staff attempts to review all changes made to this Wiki and keep information trustworthy.
Without written consent, Granite Devices' Products or Intellectual Property shall not be used in situations or installations where living beings, material property, or immaterial property could be harmed by the operation, features or failures of Product. Products may only be used in a way where hazards like moving parts, electric shock, laser radiation, or fire can't be realized even if the content of this Wiki would suggest otherwise.