Installing MMos firmware into SimuCUBE
Procedure
Before beginning, ensure you have the following prerequisites fulfilled:
- SimuCUBE board
- Power supply for SimuCUBE (during upgrade, this can be from 12 VDC to 48 VDC, with at least 10 W power capability)
- USB cable with Mini-USB-B plug for SimuCUBE
- DfuSeDemo software
- Download item STSW-STM32080 from from ST Microelectronics web site
- Suitable firmware for SimuCUBE
Preparing MMos firmware
Once you have DfuSeDemo package installed and have the MMos firmware file (.hex), you need to convert it to .dfu format:
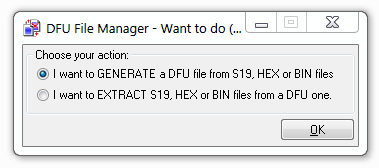
- Launch DFU File Manager application (comes with DfuSeDemo software)
- Choose "I want to GENERATE a DFU file from S19, HEX or BIN files" and click Ok
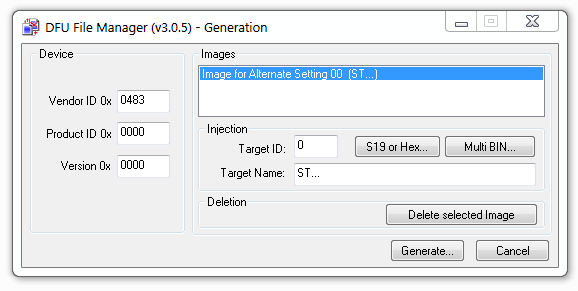
- Click "S19 or Hex.." button and open the MMos .hex file
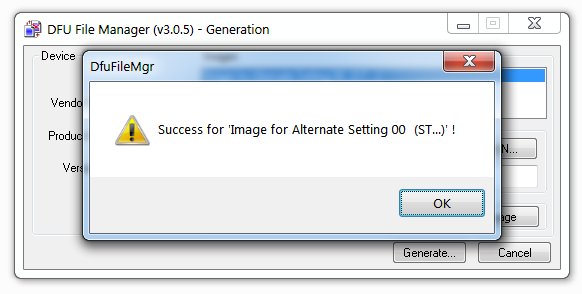
- Click "Generate.." button and save the output to mmos.dfu file with in your hard drive
Setting SimuCUBE into Device Firmware Mode (DFU)
In order to upload the newly generated .dfu file into SimuCUBE, the device needs in the DFU (Device Firmware Upgrade) mode. To get SimuCUBE in this mode, there are three cases:
Case A
Unused SimuCUBE in the factory state will be in DFU mode right after power. No actions needed. To verify this, see Windows Device Manager and check if there is STM Device in DFU Mode in it.
Note: first 50 produced SimuCUBEs do not start in DFU mode by default, if you have one of these devicess, see cases B and C.
Steps:
- Connect USB cable between SimuCUBE X3 and PC
- Power on SimuCUBE (DC supply)
- Start Device Manager and find STM Device in DFU Mode
- If device is not found, see Case B and C
Case B
If device is not in DFU mode, but has MMos firmware already installed, then using entering into DFU mode can be done by MMos configuration tool DFU mode button.
Note: if device already has MMos firmware and there is no need to upgrade the firmware, you may skip rest of this page.
Steps:
- Connect USB cable between SimuCUBE X3 and PC
- Power on SimuCUBE (DC supply)
- Start MMos ForceFeedback configuration tool
- Verify that device is connected (green USB symbol in the tool)
- Click DFU Mode
Case C
In case where device is not in DFU mode, or does not have any firmware in it, the DFU mode can be forced on by following guide below.
Steps:
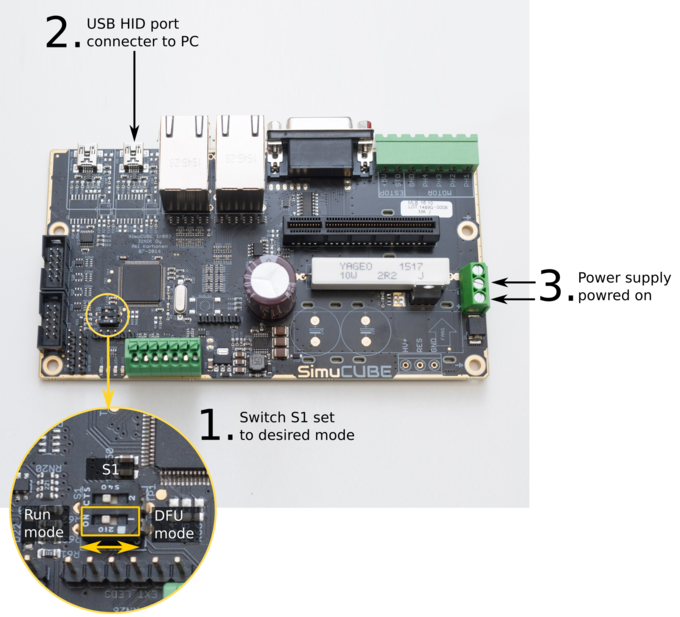
- Set on-board switch S1 position 1 to "DFU mode" as indicated in the image below. Note that first revision SimuCUBE has error in S1 on-board documentation indicating opposite switch position for DFU mode. The image in Wiki is correct and should be followed instead.
- Connect USB cable between SimuCUBE X3 and PC
- Power on SimuCUBE (DC supply)
Uploading the .dfu file to SimuCUBE4
At this point we have the mmos.dfu file and SimuCUBE in DFU mode.
| Be aware that motor may produce torque immediately after firmware has been completed loading (may happen if the on-board IONI drive has any motor configuration in it already). |
Steps:
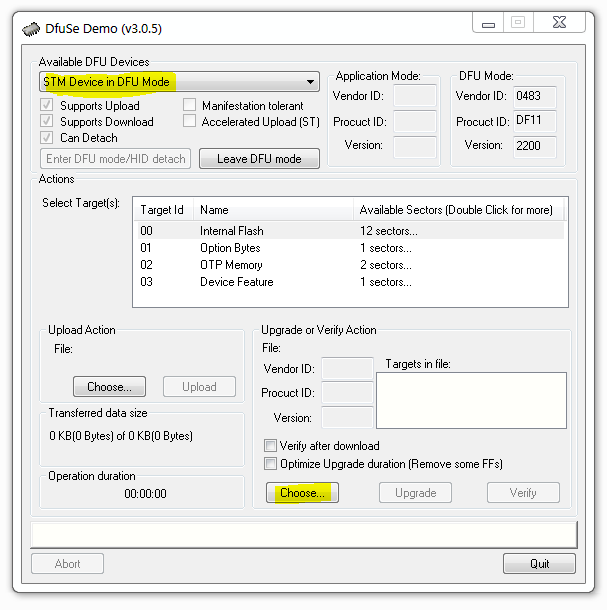
- Start DfuSeDemo application. You should see "STM Device in DFU Mode" in dropdown list. Click "Choose.." from as highlighted in the image below
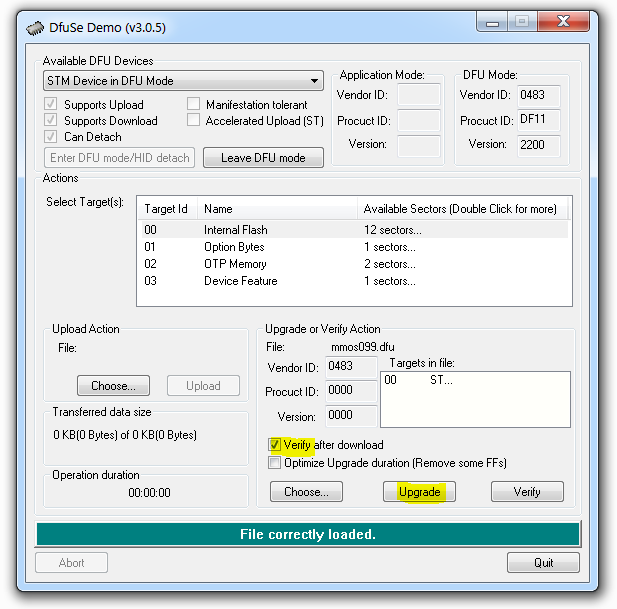
- Tick "Verify after download" and click "Upgrade"
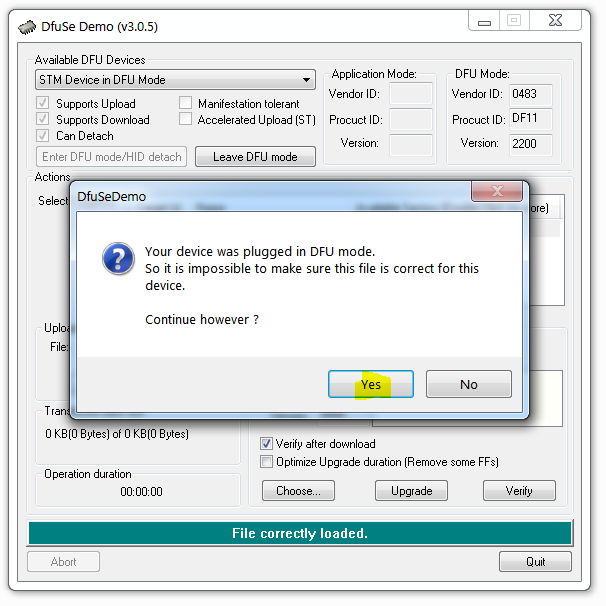
- If following question is asked, click Yes
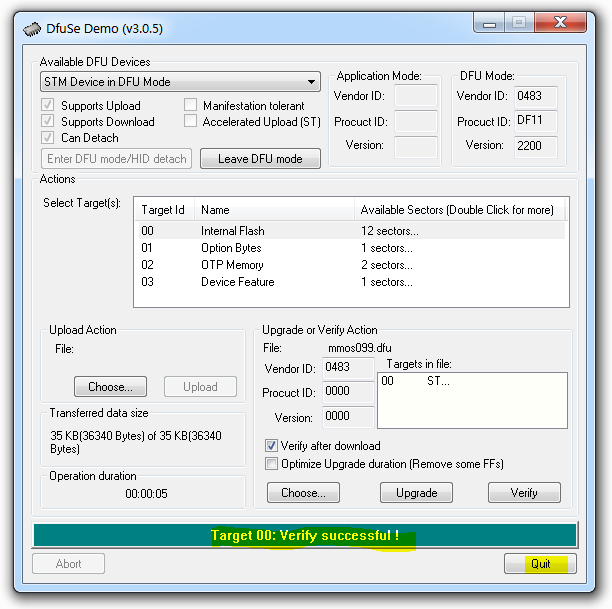
- After few seconds, following dialog will indicate the successful upgrade. Click Quit.
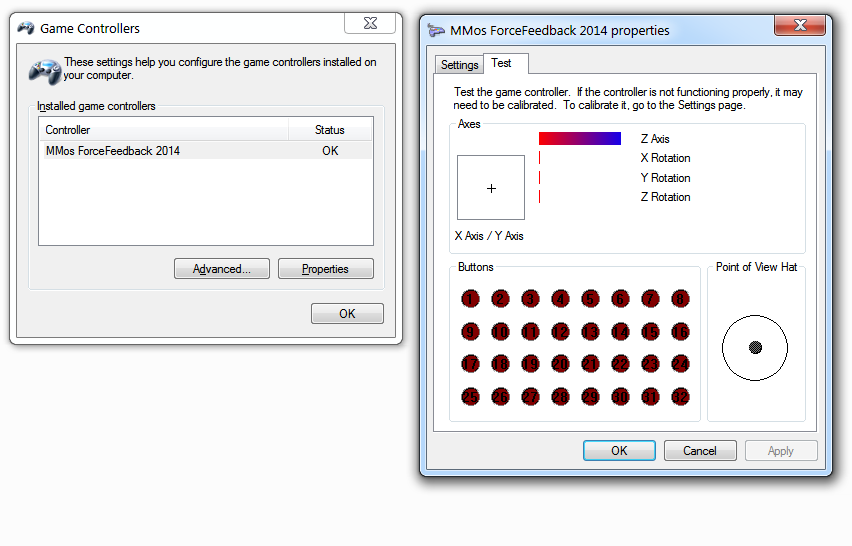
- Firmware is now installed. To start SimuCUBE in the the MMos firmware mode, set S1 to the "Run mode" and do a power down/power up. After this Windows should detect MMos device and install driver automatically. You can verify installation by checking Game Controllers dialog from Windows:
The dialog on right side shows inputs of SimuCUBE in real time. Configuration with MMos software may be necessary to make any inputs work. This topic has been covered in OpenSimWheel documentation available from various internet sites.
| Granite Devices does not manufacture or give user support for MMos firwmare. Installation and usage of the upcoming open source SimuCUBE firmware aims to simplify installation and usage process. |
| Read next |
In no event the Product Information or parts hereof shall be regarded as guarantee of conditions or characteristics. The Product Information or any part thereof may also not be regarded as a warranty of any kind. No liability of any kind shall be assumed by Author with respect to Product Information or any use made by you thereof, nor shall Author indemnify you against or be liable for any third party claims with respect to such information or any use thereof.
As content of this Wiki may be edited by user community, Granite Devices Oy or it's affiliates do not take any responsibility of the contents of this Wiki. Use information at your own risk. However, Granite Devices staff attempts to review all changes made to this Wiki and keep information trustworthy.
Without written consent, Granite Devices' Products or Intellectual Property shall not be used in situations or installations where living beings, material property, or immaterial property could be harmed by the operation, features or failures of Product. Products may only be used in a way where hazards like moving parts, electric shock, laser radiation, or fire can't be realized even if the content of this Wiki would suggest otherwise.
